Chocolate Blossom Cookies are a fun take on a classic favorite — soft, chewy chocolate cookies topped with a bright, colorful candy right in the center. The mix of rich chocolate and that little pop of sweetness from the candy makes these cookies both simple and special. They look cute too, perfect for sharing or gifting!
I really like making these because they’re so easy to whip up and bake. When the cookies come out hot from the oven and the candy on top hasn’t lost its shine, it just feels like a little celebration. I find it fun to mix and match different candy colors to fit the season or my mood—it adds a nice personal touch that everyone notices.
These cookies go great with a glass of milk or a warm cup of tea. I often pack them up for picnics or bring them to potlucks because they’re always a hit. Plus, they make me think of happy moments with friends and family gathered around, enjoying something sweet and simple together.
Key Ingredients & Substitutions
Butter: Softened unsalted butter gives these cookies their rich, tender texture. If you only have salted butter, reduce added salt slightly to keep the balance right.
Sugar: A mix of granulated and brown sugar adds both sweetness and moisture. Brown sugar lends a slight chewiness and deeper flavor. You can swap brown sugar with coconut sugar for a subtle caramel note.
Cocoa Powder: Unsweetened cocoa powder is essential for that deep chocolate flavor. Use Dutch-processed cocoa if you want a smoother, less acidic taste.
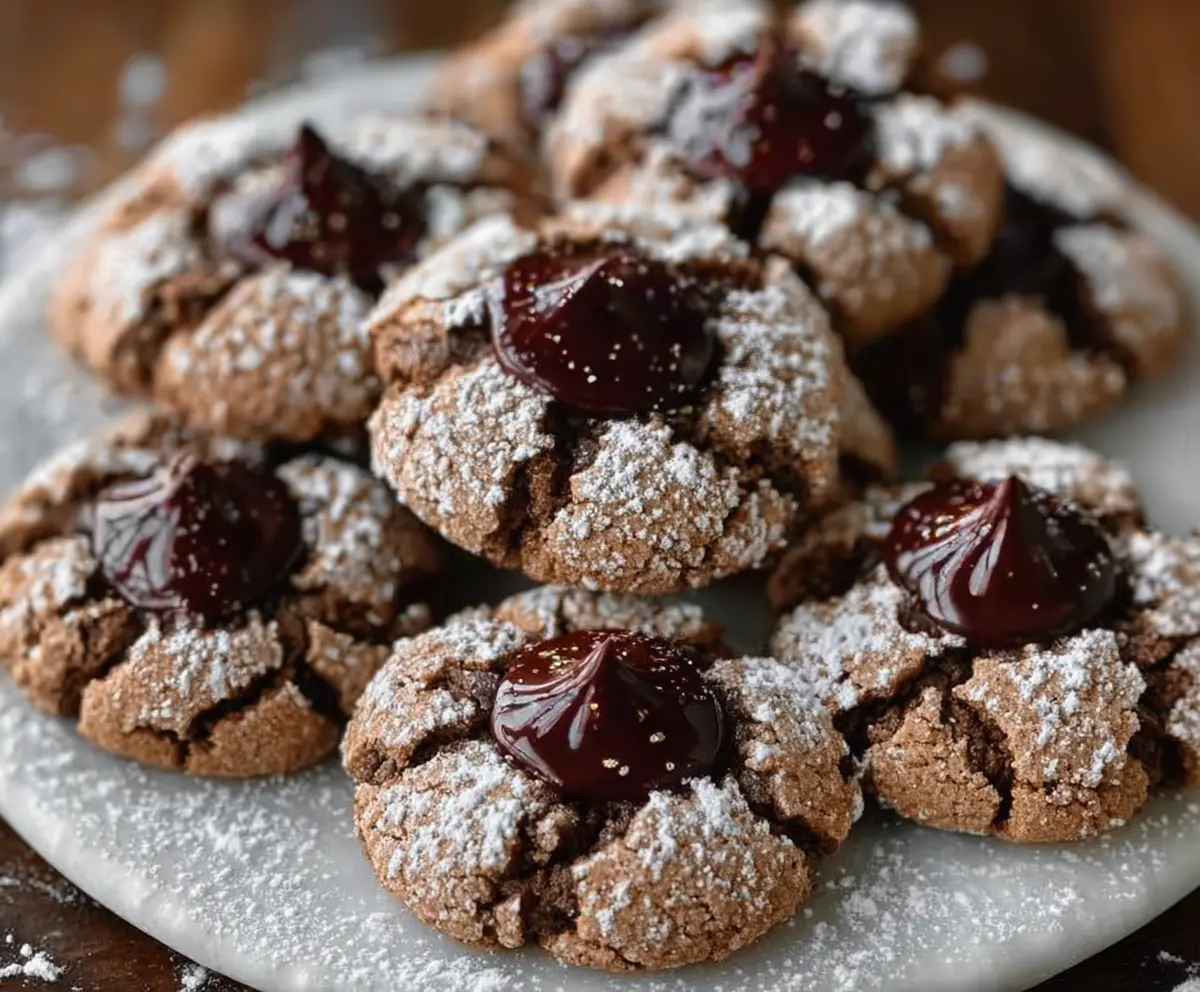
Chocolate Kisses: These create the classic “blossom” center. If you prefer, use mini peanut butter cups or other small chocolates, but adjust baking time if candies melt differently.
Powdered Sugar: Rolling dough in powdered sugar creates a pretty cracked surface and a touch of extra sweetness. Don’t skip this step for the classic look and texture.
How Do You Get the Perfect “Blossom” Crack on These Cookies?
The signature crack happens when the cookie dough spreads and sets around the chocolate kiss. To achieve this:
- Roll dough balls well in powdered sugar to form a light coating. This helps create contrast and the cracked effect.
- Bake at 350°F just until the edges are set but the center is still soft—about 9-11 minutes.
- Right after baking, gently press a chocolate kiss into the center of each cookie while still warm. Don’t press too hard or the cookie may break apart.
- Allow cookies to cool on the sheet briefly before transferring to a rack to keep their shape.
Following these steps helps the dough crack nicely around the candy, making your cookies look just right and taste soft and delicious.

Equipment You’ll Need
- Mixing bowls – I use a large bowl for mixing everything easily and a smaller one for whisking the dry ingredients.
- Electric mixer or whisk – makes creaming the butter and sugars quick and smooth.
- Baking sheets – choose ones with a flat surface to give cookies even baking.
- Parchment paper or silicone baking mats – keep cookies from sticking and make cleanup easier.
- Measuring cups and spoons – helps get the right amount of each ingredient for consistent results.
- Cookie scoop or tablespoon – helps shape uniform-sized cookies for even baking.
- Cooling racks – let the cookies cool without getting soggy on the bottom.
- Unwrapped chocolate kisses – the key finishing touch for the blossom look, so keep them handy!
Flavor Variations & Add-Ins
- Use peanut butter or caramel candies instead of chocolate kisses for different flavors and looks.
- Stir in chopped nuts, like walnuts or pecans, in the dough for extra crunch and texture.
- Add a splash of espresso powder or cinnamon to the dry ingredients for a subtle spice or coffee flavor.
- Swap semi-sweet chocolate for white or dark chocolate chips mixed into the dough for variety.
How to Make Chocolate Blossom Cookies?
Ingredients You’ll Need:
For The Cookie Dough:
- 1 cup unsalted butter, softened
- 1 cup granulated sugar
- ½ cup brown sugar, packed
- 2 large eggs
- 1 teaspoon vanilla extract
- 2 cups all-purpose flour
- ¾ cup unsweetened cocoa powder
- 1 teaspoon baking soda
- ¼ teaspoon salt
- 1 cup semisweet chocolate chips (optional)
For Rolling and Topping:
- 1 cup powdered sugar (for rolling)
- About 24 chocolate kisses or similar chocolate candies, unwrapped
How Much Time Will You Need?
This recipe takes about 15 minutes to prepare, 9-11 minutes to bake each batch, and an additional 5 minutes to cool before serving. Overall, you can have a delicious batch ready in around 30-40 minutes including cooling time.
Step-by-Step Instructions:
1. Prepare Your Oven and Baking Sheets:
Preheat your oven to 350°F (175°C). Line baking sheets with parchment paper or silicone baking mats to keep your cookies from sticking and make cleanup easy.
2. Make the Cookie Dough:
In a large bowl, beat together the softened butter, granulated sugar, and brown sugar using a hand mixer or stand mixer until the mixture is light and fluffy, about 3-4 minutes. Then add the eggs one at a time, mixing each in well. Stir in the vanilla extract.
In a separate bowl, whisk together the flour, cocoa powder, baking soda, and salt. Slowly add the dry ingredients into the wet mixture and blend until just combined. If you like, gently fold in the chocolate chips for extra chocolaty goodness.
3. Shape and Roll the Dough:
Using a tablespoon or cookie scoop, portion out the dough and roll each piece into a ball. Roll each ball lightly but evenly in the powdered sugar until fully coated. This step helps create the pretty cracked appearance on the cookies.
4. Bake and Add the Chocolate Kisses:
Place the coated dough balls onto your prepared baking sheets, spacing them about 2 inches apart so they have room to spread.
Bake the cookies for 9-11 minutes or until they are set around the edges but still soft in the center. Right after removing the cookies from the oven, immediately press one unwrapped chocolate kiss gently into the center of each cookie. The heat will soften the cookie, allowing it to crack beautifully around the candy.
5. Cool and Serve:
Let the cookies cool on the baking sheet for 5 minutes so they can firm up a bit, then transfer them to a wire rack to cool completely. For a lovely finishing touch, dust a little extra powdered sugar over the cooled cookies if you like. Now, your Chocolate Blossom Cookies are ready to enjoy!
Can I Use Frozen Butter for These Cookies?
It’s best to use softened butter at room temperature for creaming with the sugars. If you only have frozen butter, thaw it in the fridge overnight and then let it sit out for about 30 minutes before baking.
Can I Substitute the Chocolate Kisses?
Absolutely! You can use other small candies like peanut butter cups, caramel squares, or even mini Reese’s on top. Just keep in mind that softer candies may melt differently and change the texture slightly.
How Should I Store Leftover Cookies?
Store your Chocolate Blossom Cookies in an airtight container at room temperature for up to 4 days. If you want them to stay fresh longer, you can refrigerate them for up to a week or freeze for up to 3 months.
Can I Make the Dough Ahead of Time?
Yes, you can prepare the dough and refrigerate it for up to 24 hours before baking. This actually helps develop the flavors more. Just let the dough sit at room temperature for about 10 minutes before rolling into balls.