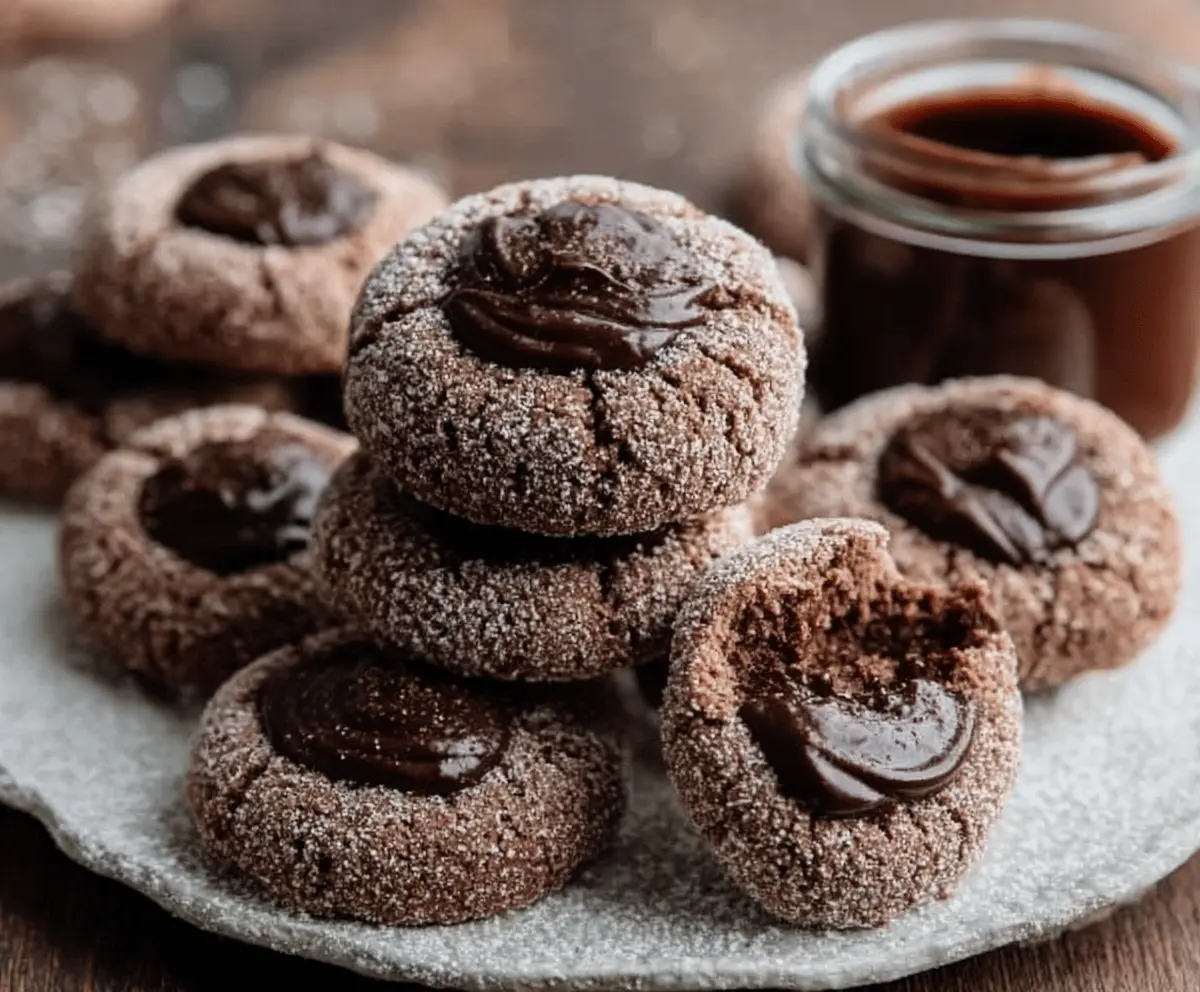
Chocolate Thumbprint Cookies are a fun and tasty treat that everyone loves! These cookies start with soft, buttery dough that you gently press with your thumb to make a little well in the center. Then, you fill that little spot with a sweet jam or melted chocolate, giving you the perfect mix of crispy cookie and gooey filling in every bite.
I really like making these cookies because they’re simple to prepare but always look so special. I usually use raspberry jam for the filling because the tartness pairs beautifully with the rich cookie base, but you can get creative with whatever jam or chocolate you have on hand. It’s also a great cookie to make with kids since pressing the dough and adding the filling is just as fun as eating them!
When I serve these cookies, I like to have a few different jams ready so people can pick their favorite, or sometimes I drizzle a little extra melted chocolate on top for a more indulgent touch. They’re perfect for sharing at holiday parties, gift-giving, or just enjoying with a cup of tea on a chilly afternoon. No matter how you enjoy them, these thumbprint cookies always bring a smile to my face!
Key Ingredients & Substitutions
Butter: Unsalted butter gives these cookies a rich, creamy base. If you need dairy-free, try using vegan butter sticks—they work well for texture and flavor.
Sugar: Granulated sugar adds sweetness and helps create a slight crunch outside. For a softer bite, you can mix in some brown sugar or use coconut sugar as a substitute.
Cocoa Powder: Unsweetened cocoa delivers deep chocolate flavor. Dutch-processed cocoa is smoother and less acidic if you prefer a milder taste.
Chocolate Ganache: This makes a luscious filling. You can swap it with chocolate spread or even jam for a fruity twist. Use a thicker filling so it stays put after baking.
How Do You Create Perfect Thumbprint Wells Without Cracking the Cookies?
Pressing the thumbprint is key for these cookies. Here’s how to do it right:
- Shape dough balls evenly, about 1 inch across, so they bake evenly.
- Use your thumb or the back of a small spoon to gently press down in the center right before baking.
- Don’t press too hard or the dough may crack; just make a shallow well to hold the filling.
- If the dough is too soft, chill it briefly before making the indentation to help maintain shape.
- Fill the wells right after baking while the cookies are warm, so the filling stays smooth.
Equipment You’ll Need
- Mixing bowls – I use these to gather the ingredients and mix everything smoothly.
- Electric hand mixer or stand mixer – makes creaming butter and sugar easy and quick.
- Baking sheets with parchment paper – prevents sticking and makes cleanup simple.
- Measuring cups and spoons – for accurate ingredient amounts.
- Small spoon or thumb – to press indentations into the cookies.
- Cooling rack – helps the cookies cool evenly after baking.
Flavor Variations & Add-Ins
- Use different jams (strawberry, apricot, or blueberry) instead of chocolate ganache for fruity surprises.
- Add a pinch of cayenne or chili powder to the dough for a spicy kick that pairs well with chocolate.
- Mix in chopped nuts or mini chocolate chips into the dough for extra texture.
- Top the filled cookies with a drizzle of white or caramel chocolate for a fancy look and extra flavor.
Chocolate Thumbprint Cookies
Ingredients You’ll Need:
- 1 cup (2 sticks) unsalted butter, softened
- 1 cup granulated sugar (plus extra for rolling)
- 1 large egg
- 1 teaspoon vanilla extract
- 2 cups all-purpose flour
- 1/2 cup unsweetened cocoa powder
- 1/4 teaspoon salt
- 1/2 teaspoon baking powder
- 1/2 cup chocolate ganache or chocolate spread (for filling)
How Much Time Will You Need?
This recipe takes about 15 minutes to prepare, 10-12 minutes for baking, plus a few minutes cooling time. So, in roughly 30 minutes, you’ll have a delicious batch of chocolate thumbprint cookies ready to enjoy!
Step-by-Step Instructions:
1. Get Ready to Bake:
Preheat your oven to 350°F (175°C) and line your baking sheets with parchment paper to keep the cookies from sticking.
2. Mix the Dough:
In a large bowl, beat the softened butter and granulated sugar together until the mixture is light and fluffy. Then add the egg and vanilla extract, mixing well. In another bowl, whisk together the flour, cocoa powder, salt, and baking powder. Slowly add the dry ingredients into the wet ingredients and mix until a soft dough forms.
3. Shape and Prepare the Cookies:
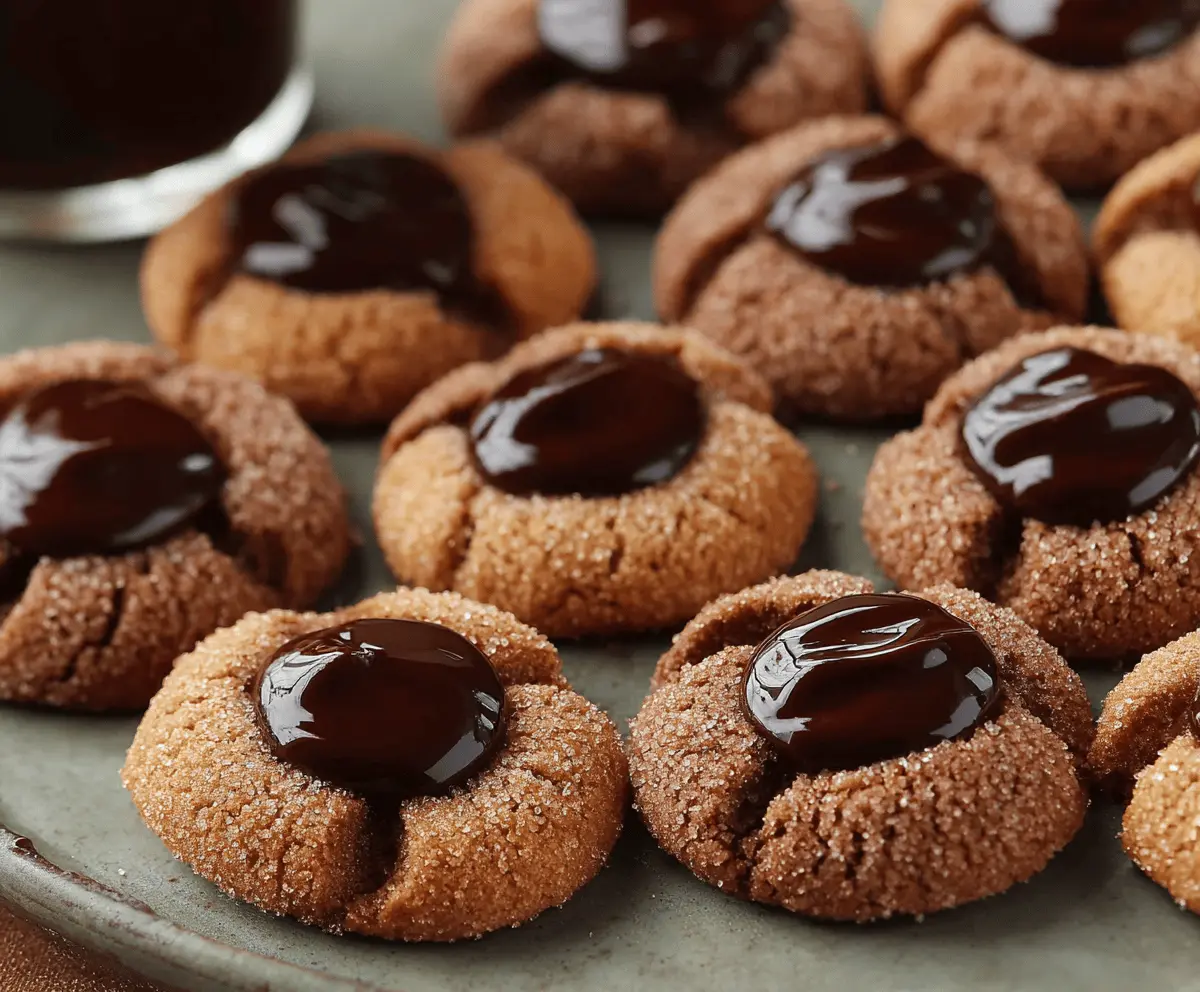
Roll the dough into 1-inch balls, then gently roll each ball in extra granulated sugar to coat. Place them spaced about 2 inches apart on your prepared baking sheet. Using your thumb or back of a spoon, lightly press into the center of each dough ball to make a small well without cracking the dough.
4. Bake and Fill:
Bake the cookies for 10-12 minutes, until they look set but still soft. Remove them from the oven and immediately fill each indentation with about 1 teaspoon of chocolate ganache or chocolate spread while the cookies are still warm.
5. Cooling and Serving:
Let the cookies cool on the baking sheet for about 5 minutes, then transfer them to a wire rack to cool completely. Once cooled, enjoy your soft, chocolatey thumbprint cookies with their rich, melty centers!
Can I Use Frozen Butter for This Recipe?
It’s best to use softened butter at room temperature for easy mixing and the right cookie texture. If your butter is frozen, thaw it overnight in the fridge or leave it on the counter for about an hour before baking.
Can I Substitute Jam Instead of Chocolate Ganache?
Absolutely! Fruit jams like raspberry, strawberry, or apricot make a delicious filling and add a nice tart contrast to the rich cookie. Just fill the thumbprints the same way after baking.
How Should I Store These Cookies?
Store your chocolate thumbprint cookies in an airtight container at room temperature for up to 4 days. For longer storage, freeze them in a sealed container for up to 3 months—just thaw before serving.
What Can I Do If My Dough Is Too Sticky?
If your dough feels too sticky to handle, chill it in the fridge for 20-30 minutes. This firms up the dough, making it easier to roll into balls and shape without sticking to your hands.