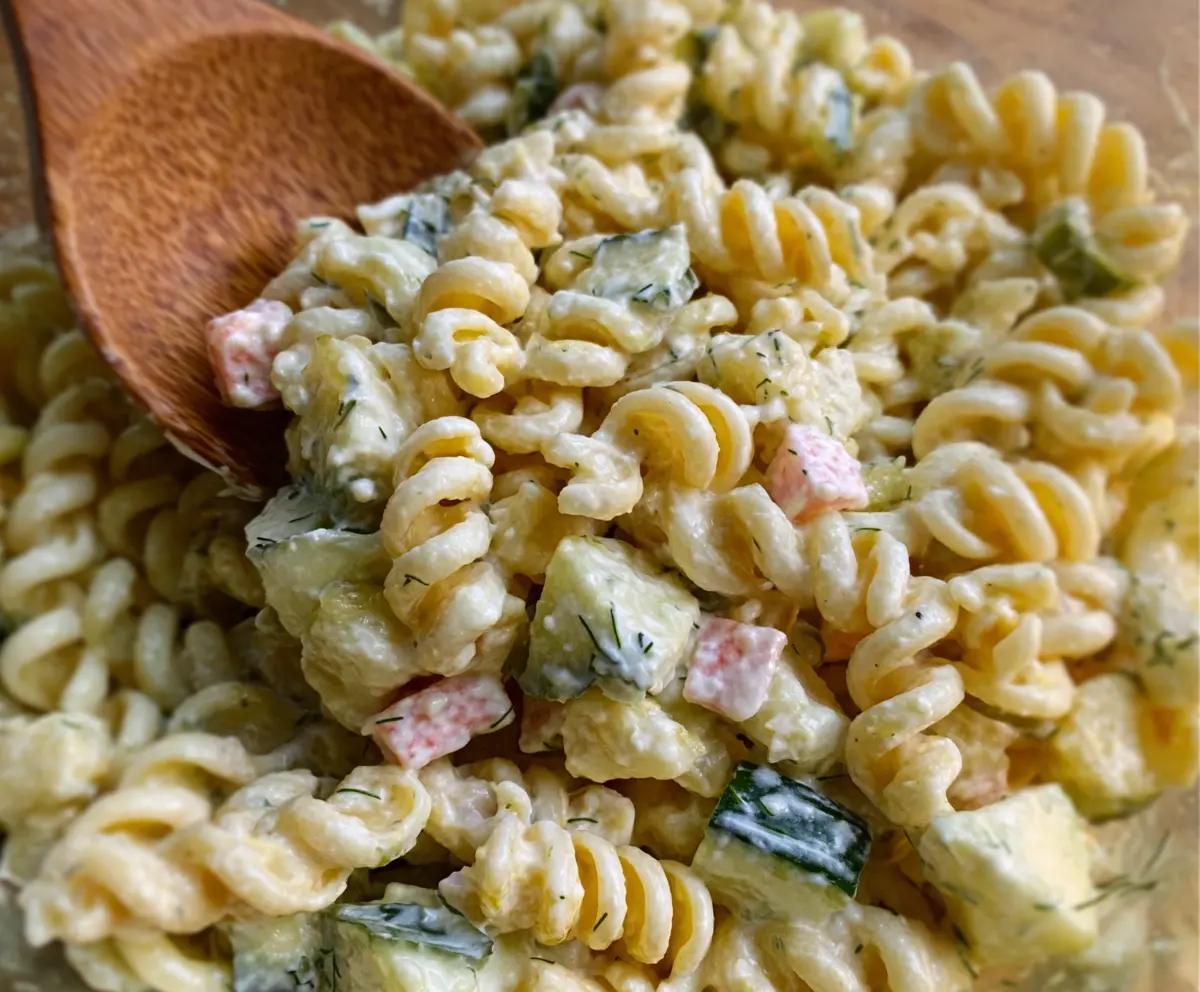
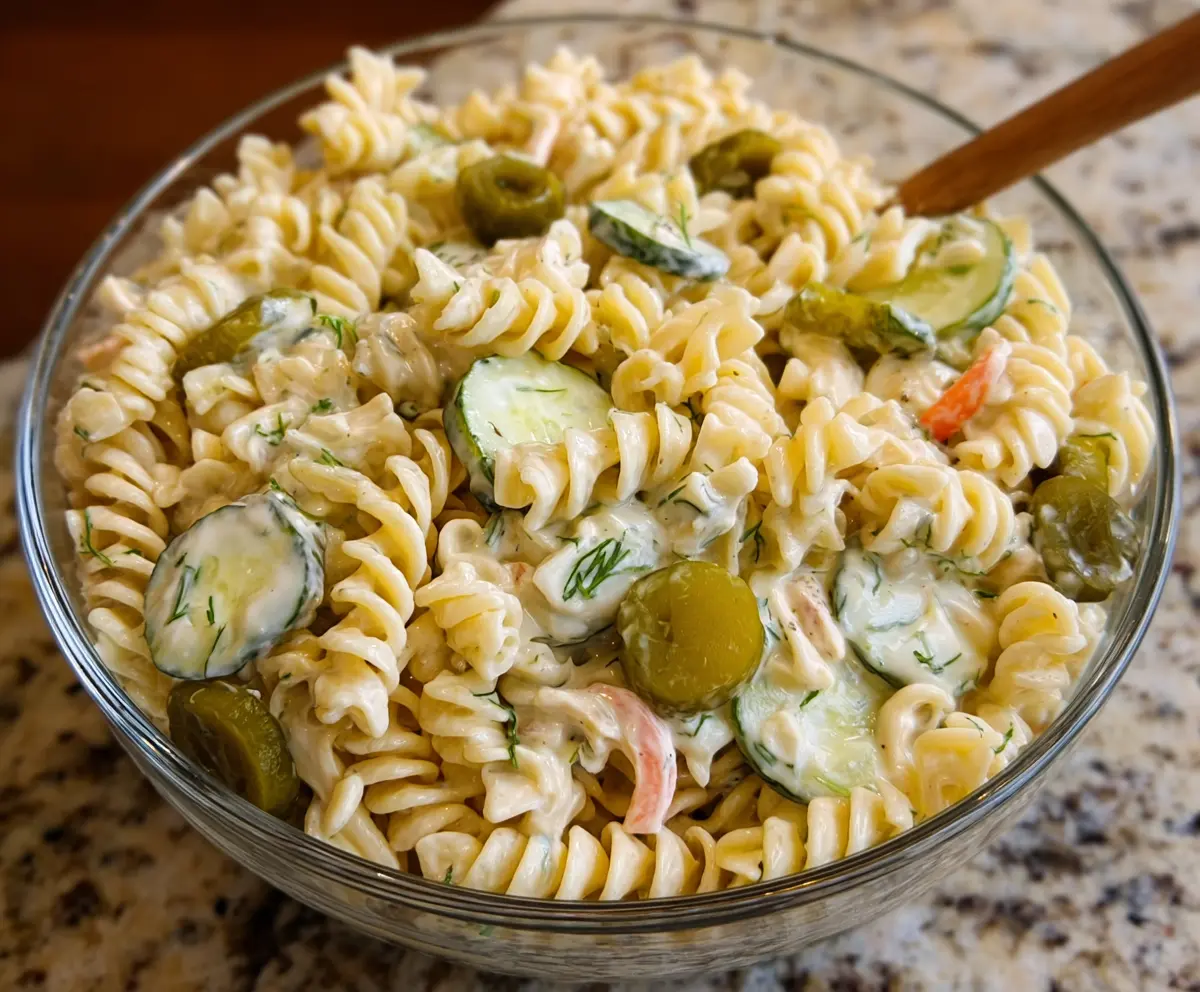
Dill Pickle Pasta Salad is a fun and tangy twist on your usual pasta dish. It combines tender pasta, crunchy dill pickles, and a creamy, slightly tangy dressing that really wakes up your taste buds. The dill adds a fresh, herby flavor that makes this salad feel lively and bright on the plate.
I love making this salad when I want something different but easy to whip up for picnics or potlucks. It’s one of those dishes that surprises people because it’s not your everyday pasta salad — the pickles give it a zesty punch that’s just so satisfying. I usually add a little extra dill because I just can’t get enough of that fresh flavor!
My favorite way to enjoy this salad is chilled and right out of the fridge on a warm day. It pairs perfectly with grilled chicken or even just some fresh bread. It’s cool, creamy, and crunchy all at once, which makes it a definite crowd-pleaser at any gathering.
Key Ingredients & Substitutions
Rotini Pasta: This spiral pasta holds onto the creamy dressing well thanks to its curls. You can swap for fusilli, penne, or any short pasta you have on hand.
Dill Pickles: The star ingredient! Use crunchy dill pickles for best texture and flavor. If you’re out, bread-and-butter pickles add a sweeter twist.
Mayonnaise: It creates the creamy base of the salad. For a lighter version, try Greek yogurt or a mix of yogurt and mayo.
Dill: Fresh dill adds a bright, herbal note. If you only have dried, a tablespoon will work but add it a little at a time to taste.
Pickle Juice: This boosts the tang and ties the flavors together. If you want less tang, reduce or leave it out.
How to Toss Pasta Salad Without Getting It Mushy?
Overmixing or using hot pasta can make your salad mushy. Here’s how to get it just right:
- Cook pasta until al dente; it should have a slight bite.
- Drain and rinse pasta under cold water to stop cooking and cool it down.
- Mix the dressing separately and add it slowly to the pasta and veggies.
- Toss gently with a large spoon or spatula—don’t stir vigorously.
- Chill for at least an hour to let flavors blend without breaking down ingredients.
Following these tips keeps your salad fresh, creamy, and with a nice bite every time.
Equipment You’ll Need
- Large pot – to cook the pasta until it’s al dente, so it stays firm and holds its shape.
- Colander – for draining your pasta quickly and easily.
- Mixing bowl – a good-sized bowl to toss all your ingredients together smoothly.
- Whisk or fork – to stir the dressing until it’s well combined and creamy.
- Refrigerator – to chill the salad and let the flavors meld before serving.
Flavor Variations & Add-Ins
- Swap imitation crab meat for cooked chicken or ham for extra protein and different flavors.
- Add shredded cheese like cheddar or Monterey Jack for a cheesy twist.
- Mix in chopped red onion or bell peppers to add a sweet or tangy crunch.
- Use fresh lemon juice instead of pickle juice for a brighter, citrusy flavor.
How to Make Dill Pickle Pasta Salad?
Ingredients You’ll Need:
- 8 oz rotini pasta (or any short spiral pasta)
- 1 cup dill pickles, chopped
- 1/2 cup imitation crab meat, diced (optional)
- 1/2 cup celery, finely chopped
- 1/4 cup fresh dill, chopped (or 1 tbsp dried dill)
- 1 cup mayonnaise
- 1 tbsp Dijon mustard
- 1 tbsp pickle juice (from the pickle jar)
- 1/2 tsp garlic powder
- 1/2 tsp onion powder
- Salt and freshly ground black pepper, to taste
How Much Time Will You Need?
This Dill Pickle Pasta Salad takes about 20 minutes to prepare, including boiling and cooling the pasta. Plus, for the best flavor, let it chill in the fridge for at least 1 hour before serving.
Step-by-Step Instructions:
1. Cook and Cool the Pasta:
Start by cooking your rotini pasta according to the package directions until it’s al dente (tender but still with a slight bite). Once cooked, drain it well and rinse under cold water to stop the cooking process and cool it down. Set the pasta aside.
2. Mix the Veggies and Herbs:
In a large bowl, combine the chopped dill pickles, diced imitation crab meat (if using), finely chopped celery, and fresh dill. These ingredients add crunch, flavor, and freshness to your salad.
3. Make the Creamy Dressing:
In a separate smaller bowl, whisk together the mayonnaise, Dijon mustard, pickle juice, garlic powder, and onion powder until the dressing feels smooth and creamy.
4. Combine Everything:
Add the cooled pasta into the big bowl with the veggies, then pour the creamy dressing over the top. Gently toss everything together to make sure every piece of pasta and veggie is well coated with the dressing.
5. Final Seasoning and Chill:
Taste your salad, then add salt and freshly ground black pepper as you like. Feel free to adjust the dressing — a little extra pickle juice for tang or more mayo for creaminess. Cover the salad and refrigerate it for at least an hour so the flavors get to know each other and taste even better.
6. Serve and Enjoy:
When ready, serve the salad chilled. Sprinkle a bit of extra fresh dill on top if you like for a pretty and tasty finish. This salad is great on its own or as a side at picnics and barbecues!
Can I Use Frozen Pasta for This Salad?
Yes, you can use frozen cooked pasta if you have some on hand—just thaw it completely and drain any excess water before mixing it into the salad to avoid sogginess.
Can I Make This Salad Ahead of Time?
Absolutely! It actually tastes better after chilling for a few hours or overnight as the flavors meld beautifully. Just keep it covered in the fridge.
How Should I Store Leftovers?
Store any leftovers in an airtight container in the refrigerator for up to 3 days. Give it a gentle stir before serving again to redistribute the dressing.
What Can I Use Instead of Imitation Crab Meat?
If you prefer or don’t have imitation crab, cooked chicken, ham, or even chickpeas make great alternatives to add protein and texture.