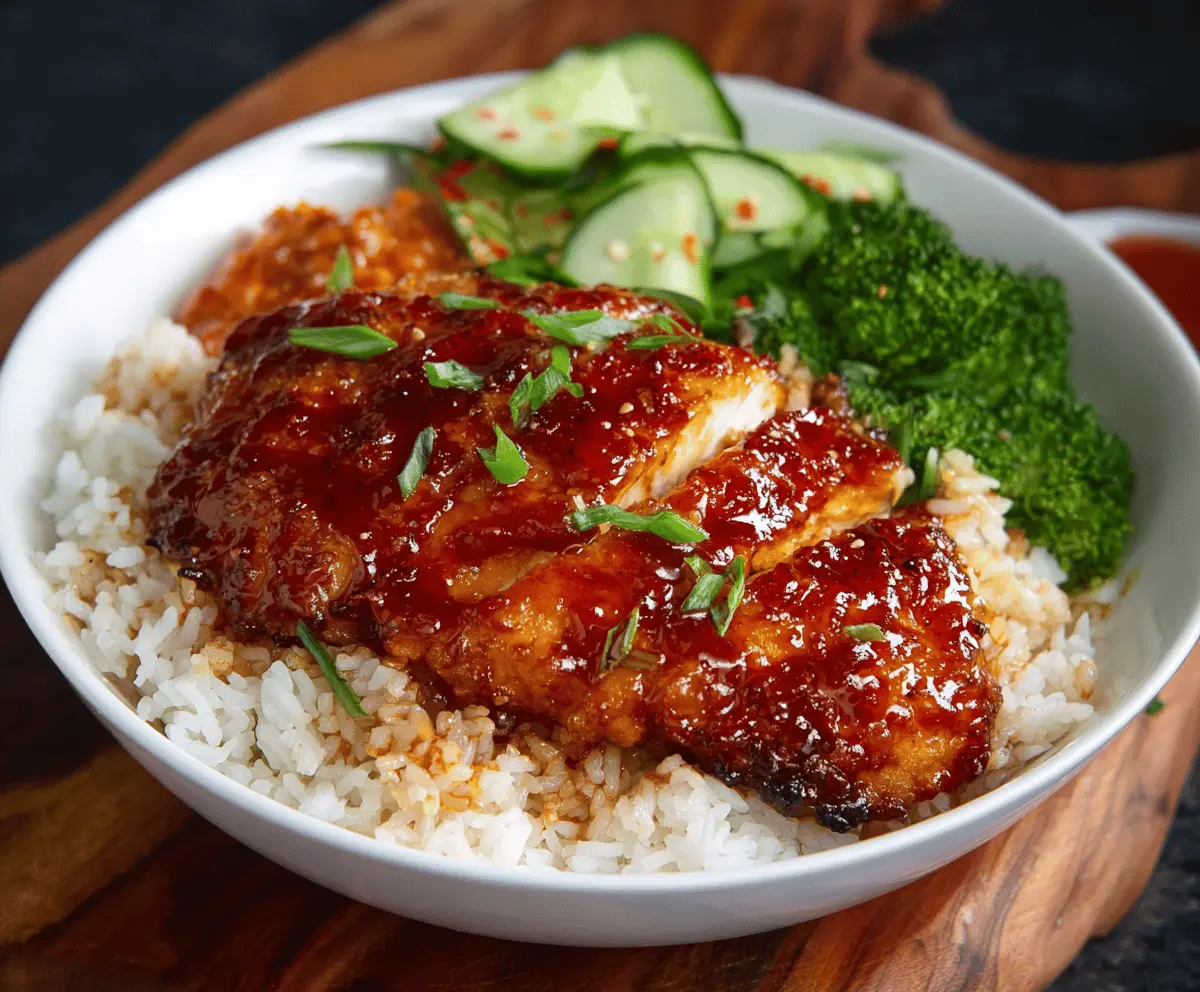
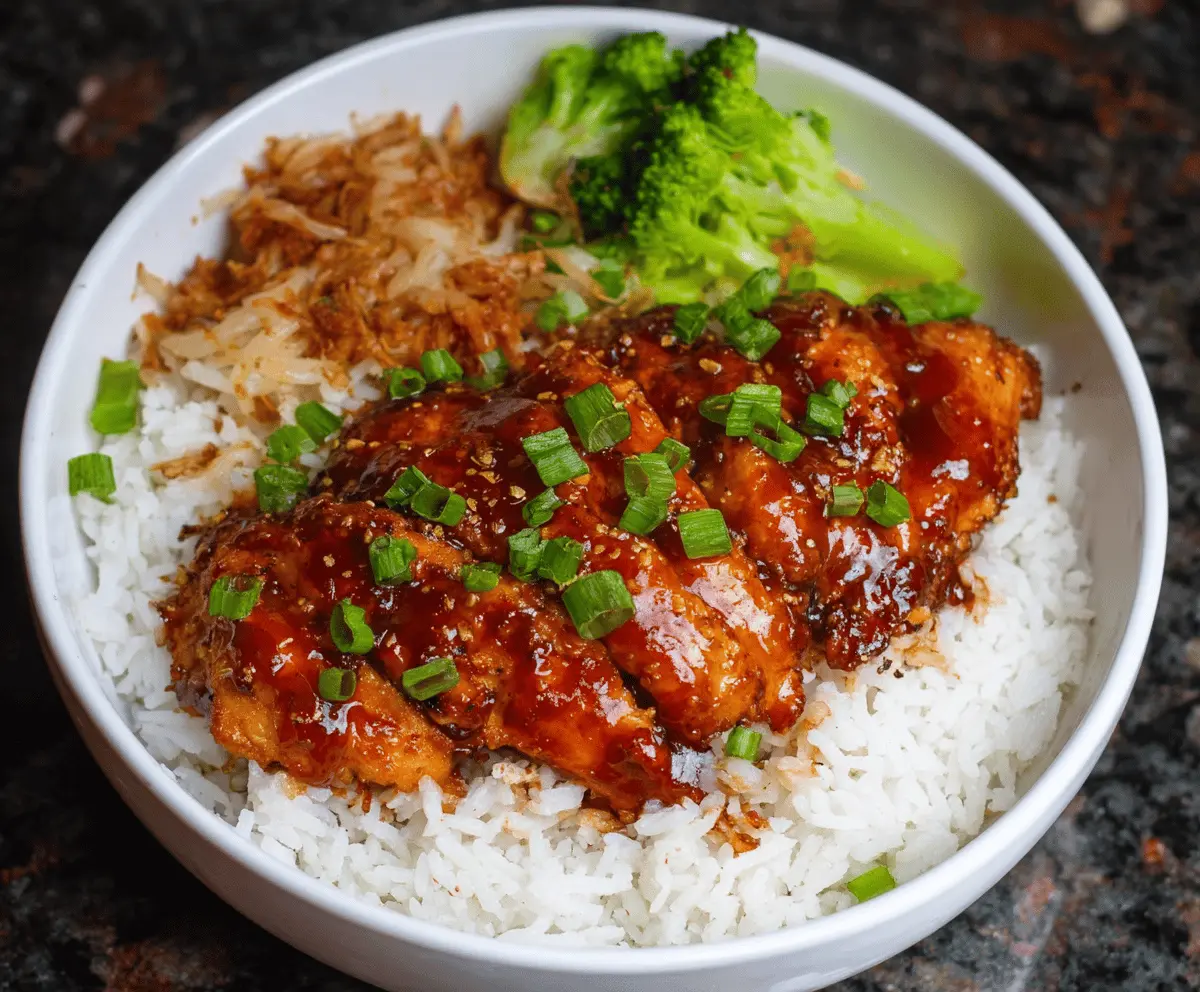
Honey BBQ Chicken Rice is a delicious mix of sweet, tangy, and smoky flavors all in one bowl. The chicken is coated in a sticky honey BBQ sauce that caramelizes perfectly, while the rice acts as the cozy base soaking up all those tasty juices. It’s a simple dish, but it feels like a treat every time.
I love making this recipe on busy weeknights because it comes together fast and leaves the whole kitchen smelling amazing. I usually add a sprinkle of green onions or some steamed veggies on the side to keep things fresh and colorful. The honey BBQ sauce has just the right amount of sweetness to please both kids and adults in my house.
One of my favorite ways to enjoy Honey BBQ Chicken Rice is to pack it for lunch the next day. The flavors get even better as they sit, and it’s so comforting to eat something homemade that’s packed with flavor. It’s the kind of meal that feels like a warm hug anytime you need it.
Key Ingredients & Substitutions
Chicken breasts: Using boneless, skinless breasts keeps the recipe simple and lean. You can swap with thighs for juicier meat if preferred—it adds more flavor but takes a bit longer to cook.
Honey BBQ sauce: The mix of BBQ sauce and honey makes a sweet and tangy glaze. If you want less sugar, reduce the honey or try maple syrup. For a smoky kick, smoked paprika is a great addition but optional.
Panko breadcrumbs: These give the chicken a nice crunch. If you don’t have panko, regular breadcrumbs work fine, or just skip them for a lighter dish. Flour coating alone will still make a tasty chicken.
Rice: Jasmine or sushi rice works best here because they cook fluffy and stick just right to soak up the sauce. Brown rice can be used to add fiber but takes longer to cook.
Vegetables: Steamed broccoli and fresh cucumber add color and balance the rich chicken. Feel free to swap for green beans, snap peas, or a simple salad on the side for freshness.
How Can I Get Crispy, Juicy Chicken with a Sticky Honey BBQ Glaze?
For crispy chicken that stays juicy, the coating and cooking steps are crucial:
- Slice chicken evenly to cook at the same rate.
- Use a three-step dredge: flour, egg wash, then panko or flour. This builds a nice crust.
- Heat oil until hot but not smoking (medium-high heat). This seals the crust quickly.
- Fry chicken 4-5 minutes per side; avoid flipping too often to keep crust intact.
- Drain on paper towels to avoid sogginess.
- Coat the hot chicken generously with honey BBQ sauce after frying. Warm chicken helps sauce stick and caramelize a bit.
Following these steps will give you chicken that’s tender inside, crispy outside, and perfectly sticky from the honey BBQ glaze. Don’t rush the frying—patience makes a big difference!
Equipment You’ll Need
- Skillet or frying pan – I recommend a good non-stick or cast-iron skillet to get a crisp crust and even heat.
- Three shallow bowls – for dredging the chicken in flour, eggs, and breadcrumbs, making coating quick and easy.
- Cooking thermometer (optional) – to check that the chicken reaches 165°F for safety and juiciness.
- Small saucepan – to mix and heat the honey BBQ sauce, so it’s ready to glaze the chicken.
- Cooking spoon or tongs – for flipping the chicken and stirring the sauce without mess.
- Measuring cups and spoons – to accurately mix the sauce ingredients and rice.
Flavor Variations & Add-Ins
- Swap chicken for pork tenderloin or shrimp—these cook quickly and work well with the BBQ sauce.
- Add sliced pineapple or bell peppers to the rice for a sweet and crunchy twist.
- Mix in some grated cheese like Monterey Jack or cheddar on top before serving for extra richness.
- Spice things up with a dash of cayenne pepper or hot sauce in the honey BBQ sauce, perfect if you like heat.
Honey BBQ Chicken Rice
Ingredients You’ll Need:
For the Chicken:
- 2 boneless, skinless chicken breasts
- Salt and pepper, to taste
- 1 cup all-purpose flour (for dredging)
- 2 eggs, beaten
- 1 cup panko breadcrumbs (optional for extra crispiness)
- 2 tablespoons vegetable oil (for frying)
For the Rice and Veggies:
- 1 cup cooked white rice (jasmine or sushi rice preferred)
- 1 cup broccoli florets, steamed
- ½ cucumber, thinly sliced
- 2 green onions, chopped (for garnish)
For the Honey BBQ Sauce:
- ½ cup BBQ sauce (your favorite brand or homemade)
- 3 tablespoons honey
- 1 tablespoon soy sauce
- 1 teaspoon garlic powder
- 1 teaspoon apple cider vinegar (optional for tanginess)
- ½ teaspoon smoked paprika (optional)
How Much Time Will You Need?
This recipe takes about 20 minutes of prep and cooking time. You’ll spend around 10 minutes preparing the chicken and sauce, 10 minutes frying the chicken, and a few moments to steam broccoli and prepare veggies. It’s a quick, tasty meal perfect for weeknights!
Step-by-Step Instructions:
1. Make the Honey BBQ Sauce:
In a small bowl, mix together the BBQ sauce, honey, soy sauce, garlic powder, apple cider vinegar, and smoked paprika. Stir well and set aside while you prepare the chicken.
2. Prepare the Chicken:
Slice each chicken breast into thick cutlets. Season both sides with salt and pepper. Set up three shallow bowls: one with flour, one with beaten eggs, and one with panko breadcrumbs (if using).
3. Coat the Chicken:
Coat each chicken cutlet first in flour and shake off excess. Next, dip it into the beaten eggs. Finally, coat it evenly with panko breadcrumbs or extra flour if you prefer a lighter coating.
4. Cook the Chicken:
Heat vegetable oil in a skillet over medium-high heat. Once hot, add the chicken cutlets. Fry each side for about 4-5 minutes until golden brown and fully cooked inside. Transfer cooked chicken to paper towels to drain any extra oil.
5. Sauce and Serve:
Brush or spoon the honey BBQ sauce over the cooked chicken generously. To serve, place a bed of cooked rice in a bowl, arrange the sauced chicken on top, and add steamed broccoli and fresh cucumber slices on the side. Sprinkle chopped green onions over everything for a fresh touch.
6. Final Touch:
If you like, drizzle extra honey BBQ sauce over the rice. Serve your delicious Honey BBQ Chicken Rice warm and enjoy!
Can I Use Frozen Chicken for This Recipe?
Yes! Just be sure to fully thaw the chicken in the refrigerator overnight before cooking. Pat it dry to remove excess moisture for a better crispy coating.
Can I Make This Dish Ahead of Time?
Absolutely. You can prepare the chicken and sauce in advance and store them separately in the fridge for up to 2 days. Reheat gently in a skillet or microwave before serving to keep the coating crispy.
How Should I Store Leftovers?
Store leftovers in an airtight container in the refrigerator for up to 3 days. Reheat in a skillet over medium heat to keep the chicken crispy, or microwave with a damp paper towel to maintain moisture.
What Can I Substitute for Panko Breadcrumbs?
If you don’t have panko, regular breadcrumbs or crushed cornflakes work well as alternatives. For a lighter version, you can skip the breadcrumbs and just use flour and egg for coating.