Juicy baked pork tenderloin earns its place in the dinner rotation because it gives you a golden crust, a pink center, and a short cooking time that still feels special. The trick is treating it like a quick-roasting roast, not a long-baked one. That means a hard sear first, then a hot oven, then a short rest so the juices stay where they belong.
This version leans on garlic, smoked paprika, thyme, and rosemary for a savory crust that tastes deeper than the ingredient list looks. Olive oil helps the spices cling and keeps the surface from drying out, while a quick sear builds the color that most oven-only pork misses. Pork tenderloin is lean, so the margin between perfect and dry is small, but the temperature target keeps it honest.
Below, I’ve included the small details that matter most, from when to pull the skillet out of the oven to how to slice the meat so it stays tender. If you’ve ever ended up with dry pork, the fix is probably simpler than you think.
The seasoning crust browned beautifully in the skillet, and both tenderloins stayed juicy after the 5-minute rest. I sliced it a little too soon the first time, and the second one held onto the juices perfectly.
Save this baked pork tenderloin for the night you want a crisp herb crust and a juicy center without a long roasting time.
The part that keeps pork tenderloin juicy instead of dry
The biggest mistake with pork tenderloin is cooking it like a thick pork chop and waiting for it to feel firm all the way through. By the time it feels firm, it’s already overdone. Pork tenderloin is lean and narrow, so it needs high heat, a short roast, and an early stop at 145°F. That final rest matters just as much as the oven time because the juices redistribute instead of spilling onto the cutting board.
Searing first does two jobs at once: it gives you color fast, and it starts building a crust before the oven has time to pull moisture out of the meat. If you skip the sear, the exterior stays pale and the seasoning tastes flatter. If you roast too long, the center loses that blush-pink tenderness that makes this cut worth buying.
What Each Ingredient Is Actually Doing in This Recipe
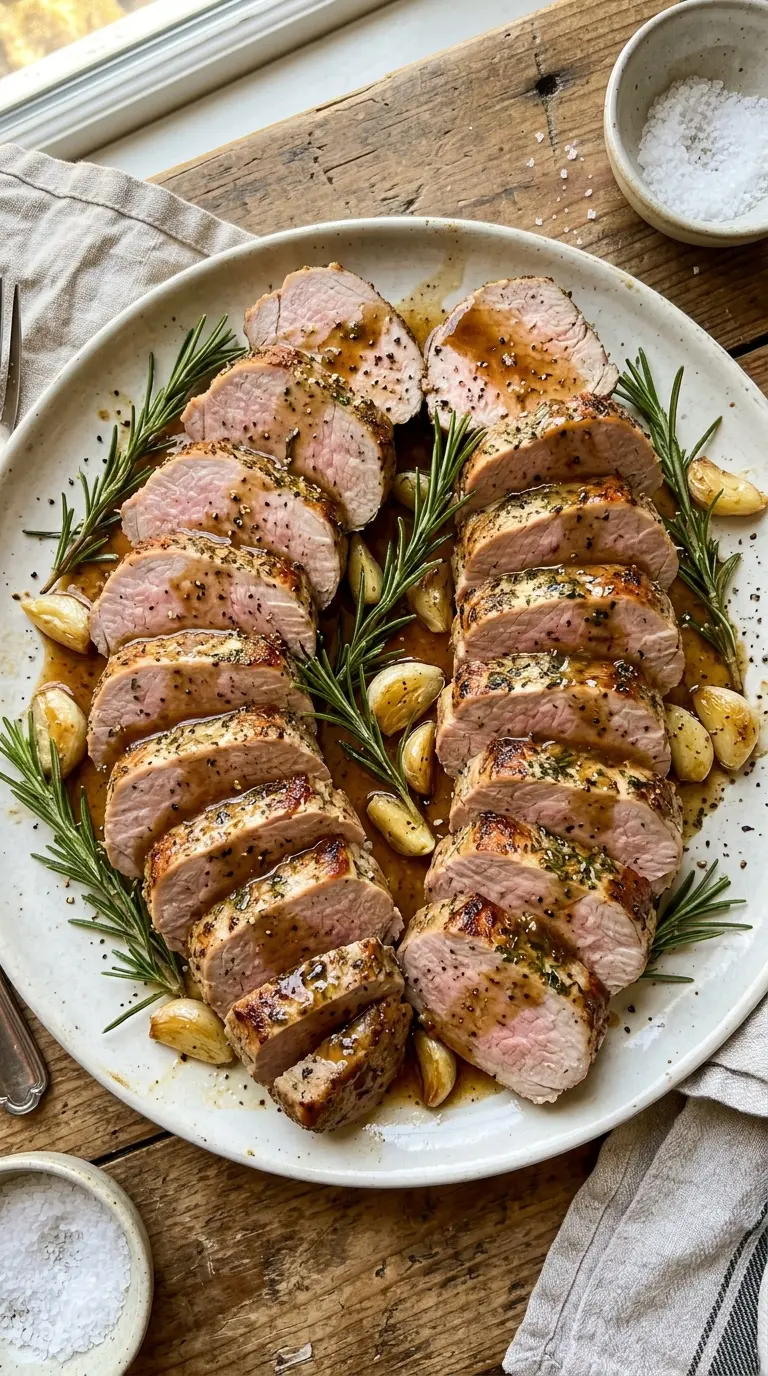
- Primary ingredient (the star) — Quality matters most. Choose the best you can find.
- Cooking medium (oil, butter, or broth) — This carries flavors and prevents dryness.
- Seasonings (salt, pepper, spices, herbs) — Layer flavors so nothing overpowers. Build depth gradually.
- Aromatics (garlic, onion, herbs) — Cook with fat to bloom flavors. Become the foundation.
- Supporting ingredients — Complement the main ingredient without overpowering it.
- Sauce or liquid (if applicable) — Brings flavors together. Balance richness with acid.
- Acid (lemon, vinegar, wine, or other) — Brightens and prevents flat-tasting results.
- Final finish (garnish, glaze, or sauce) — Prevents one-dimensional taste and adds visual appeal.
What the spice rub is doing before the pork even hits the oven
- Olive oil — This is the glue that holds the seasoning on and helps the crust brown. Use a standard extra-virgin or regular olive oil; there’s no reason to use anything fancy here.
- Garlic — Fresh minced garlic gives the crust its sharp, savory edge. Garlic powder works in a pinch, but fresh garlic browns into something deeper and more layered.
- Smoked paprika — This is what gives the crust a subtle roast note and a little color. If you only have sweet paprika, the pork will still work, but you’ll lose that smoky depth.
- Thyme and rosemary — These herbs match pork beautifully because they stay fragrant under heat. Dried herbs are fine here, but crush the rosemary between your fingers before mixing it in so it releases more of its oils.
- Salt and black pepper — Salt seasons the meat all the way through, not just the surface. Pepper adds bite, but don’t bury the rub under so much pepper that it masks the paprika and herbs.
How to get a browned crust and a pink center in the same cook
Drying and seasoning the pork
Pat the tenderloins dry before anything else. Moisture on the surface steams the meat, and steaming is the enemy of browning. Rub the pork all over with the oil and spice mixture until every side looks coated and a little tacky. If the rub seems to slide off, the pork was still wet, so wipe it down again before coating it.
Searing for color, not for doneness
Heat the skillet until it’s properly hot, then sear the pork for about 2 minutes per side. You’re looking for a deep golden crust, not full cooking. If the pan isn’t hot enough, the meat will sit there and gray out before it ever browns. Don’t crowd the skillet if the tenderloins are large; give them space so the surface can sear instead of steam.
Roasting until the temperature is right
Transfer the skillet to the oven and roast until the thickest part of the pork hits 145°F. Start checking early, around 18 minutes, because tenderloin can move from perfect to dry fast. Pull it from the oven as soon as it reaches temperature; carryover heat will finish the job during the rest. If you wait for a higher number in the oven, the center will lose that juicy texture.
Resting and slicing without losing the juices
Let the pork rest for 5 minutes before slicing. That short pause keeps the juices from running out the moment the knife hits the meat. Slice against the grain into thin pieces so each bite stays tender. If the juices still pool on the board, the pork was cut too soon.
How to adapt baked pork tenderloin for different kitchens and appetites
Dairy-free and naturally gluten-free
This recipe already fits both diets as written. The seasoning rub and cooking method don’t rely on dairy or flour, so you get the same crust and juiciness without changing a thing.
Using fresh herbs instead of dried
Swap in 1 tablespoon each of chopped fresh thyme and rosemary for the dried herbs. Fresh herbs bring a brighter finish, but they’re less concentrated, so you need more of them to get the same impact.
Making it milder for picky eaters
Cut the smoked paprika in half and lean a little harder on garlic and thyme. You’ll lose some of the smoky edge, but the pork will still taste seasoned and balanced instead of spicy or heavy.
Cooking for a crowd
Double the seasoning, but sear and roast the tenderloins in batches if needed. Crowding the pan drops the heat and weakens the crust, which is the first thing people notice when the meat hits the table.
Storage and Reheating
- Refrigerator: Store leftovers in an airtight container for up to 4 days. The crust softens a little, but the meat stays good for slicing onto sandwiches or serving with pan juices.
- Freezer: Pork tenderloin freezes well. Wrap slices tightly and freeze for up to 2 months; thaw overnight in the refrigerator so the texture doesn’t turn watery.
- Reheating: Reheat gently in a covered skillet with a splash of broth or in a low oven until just warmed through. High heat dries pork out fast, so don’t blast it in the microwave unless you’re working with thin slices and short bursts.
Answers to the questions worth asking
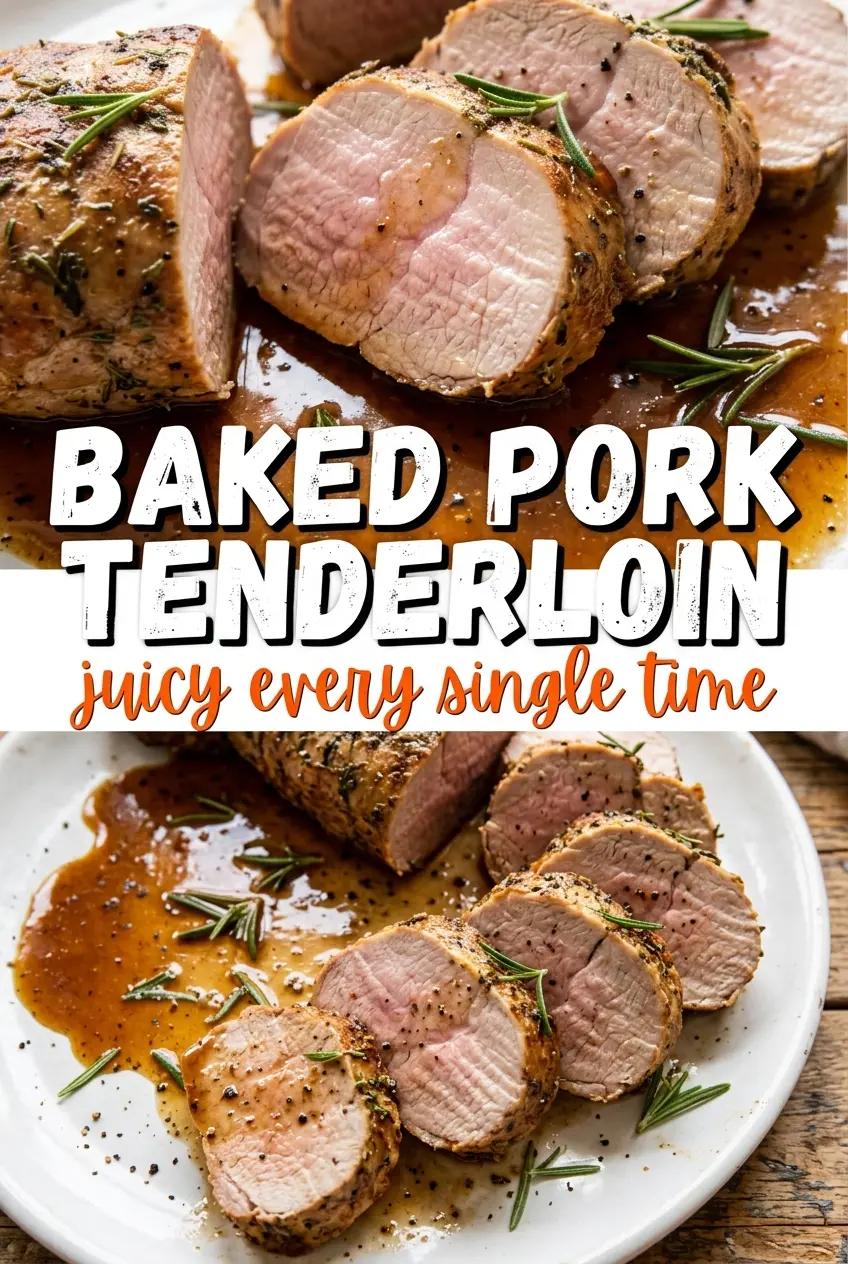
Baked Pork Tenderloin
Ingredients
Equipment
Method
- Preheat the oven to 425°F. Set up an oven-safe skillet so it’s ready for searing.
- Pat pork tenderloins dry, then mix olive oil with garlic, smoked paprika, dried thyme, dried rosemary, onion powder, salt, and black pepper. Rub the mixture all over both tenderloins until evenly coated with a dark herb crust.
- Heat an oven-safe skillet over medium-high heat and sear the tenderloins 2 minutes per side until golden all over. You should see browned edges and a fragrant crust forming.
- Transfer the skillet to the oven and roast for 18–22 minutes, until the internal temperature reaches 145°F. The exterior should look set and golden while the center stays juicy and slightly blush-pink.
- Rest for 5 minutes before slicing and serving. Let juices settle so each slice stays moist and pink.
- Garnish with fresh rosemary right before serving. Add it sparingly so the needles sit on top of the golden crust.