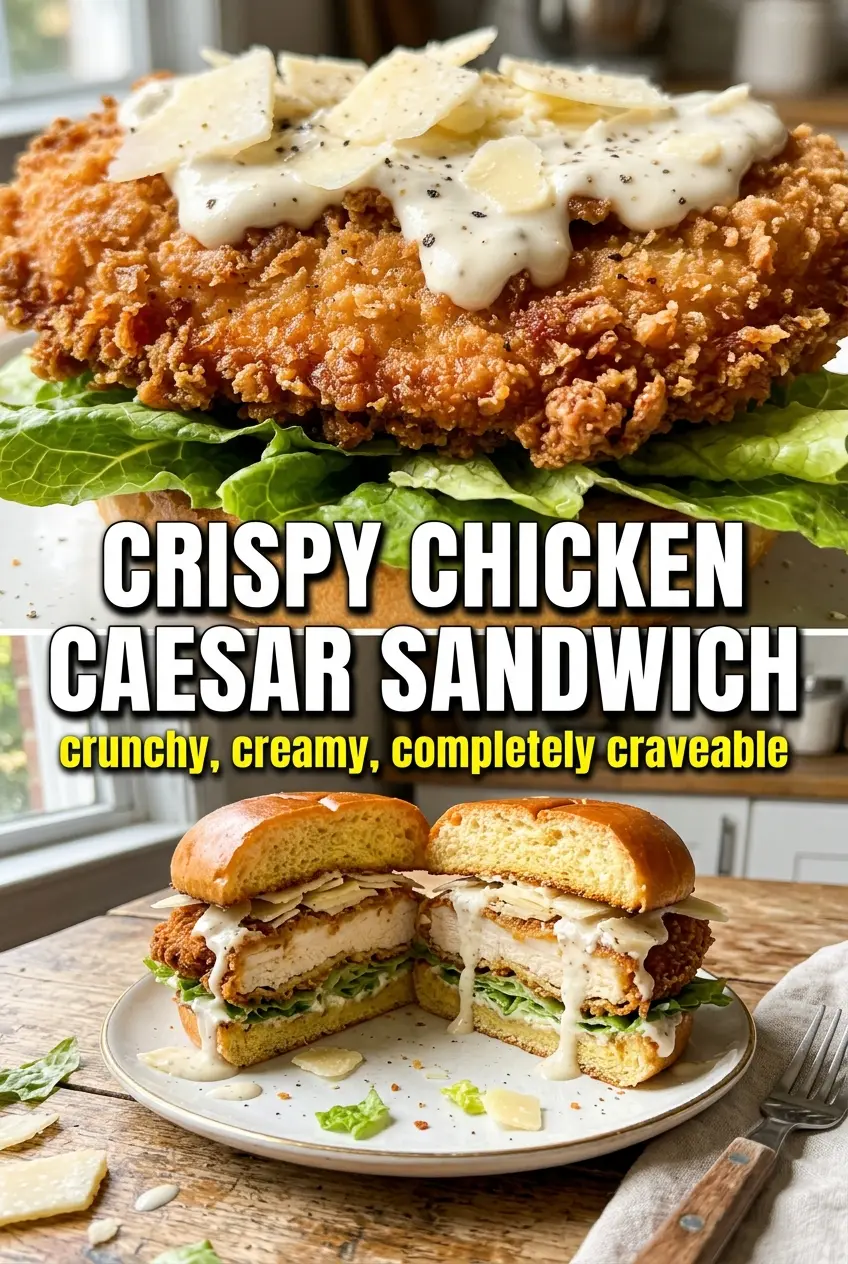
Golden, crunchy chicken tucked into a toasted brioche bun with cool romaine and creamy Caesar dressing is the kind of sandwich that disappears fast. The contrast is the whole point here: a crackly panko crust, salty parmesan, and just enough dressing to coat the lettuce without turning the bun soggy. It eats like a lunch sandwich but lands with the kind of satisfaction you usually expect from a diner meal.
What makes this version work is the way the breading is built. Panko gives you that shattering crust, while parmesan in the coating adds flavor and helps the exterior brown deeply in the pan. Pounding the chicken thin matters too, because it gives you even cooking before the coating has time to overbrown. The romaine gets tossed with Caesar dressing first, so every bite has that familiar salad flavor without dumping a pool of dressing onto the bun.
Below you’ll find the breading method that keeps the crust attached, plus a few smart swaps if you need to adapt the sandwich for different diets or what’s already in your kitchen.
The chicken stayed crunchy even after I added the Caesar-dressed romaine, and the parmesan in the coating gave it this salty, almost nutty flavor. I made them for dinner and my husband asked if we could have them again the next night.
Like this crispy chicken Caesar sandwich? Save it to Pinterest for the days when you want a crunchy cutlet, cool romaine, and creamy dressing in one stacked bite.
The Breading Trick That Keeps the Crust on the Chicken
The biggest failure point in a sandwich like this is a crust that slides off the chicken after frying. That usually happens when the cutlet is wet, the breading isn’t pressed on firmly, or the oil isn’t hot enough to set the coating quickly. The flour gives the egg something to cling to, and the egg gives the panko-parmesan mix a surface to lock onto.
Thin chicken cutlets matter here because they cook through before the crust overbrowns. If the oil is only warm, the coating absorbs it and turns heavy instead of crisp. You want a steady sizzle the second the chicken hits the pan, not a lazy bubble.
- Panko breadcrumbs — These give you the airy, crunchy crust you want. Regular breadcrumbs work in a pinch, but they’ll taste denser and won’t shatter the same way.
- Parmesan cheese — Grated parmesan goes into the coating for salt and browning, while shaved parmesan on the finished sandwich adds texture. Use the real stuff here; shelf-stable powder won’t melt and brown the same way.
- Brioche buns — Soft, lightly sweet buns balance the salty chicken and Caesar dressing. Toast them cut-side down so they hold up under the dressed lettuce.
- Romaine lettuce — Romaine stays crisp and gives the sandwich that classic Caesar crunch. Chop it into bite-size pieces so it sits neatly on the bun instead of sliding out.
What Each Ingredient Is Actually Doing in This Recipe

- Primary ingredient (the star) — Quality matters most. Choose the best you can find.
- Cooking medium (oil, butter, or broth) — This carries flavors and prevents dryness.
- Seasonings (salt, pepper, spices, herbs) — Layer flavors so nothing overpowers. Build depth gradually.
- Aromatics (garlic, onion, herbs) — Cook with fat to bloom flavors. Become the foundation.
- Supporting ingredients — Complement the main ingredient without overpowering it.
- Sauce or liquid (if applicable) — Brings flavors together. Balance richness with acid.
- Acid (lemon, vinegar, wine, or other) — Brightens and prevents flat-tasting results.
- Final finish (garnish, glaze, or sauce) — Prevents one-dimensional taste and adds visual appeal.
Getting the Chicken Crispy Before the Sandwich Comes Together
Building the Three-Stage Breading Station
Set the flour, beaten eggs, and panko-parmesan mixture in separate shallow dishes before you start coating. Season the flour with salt and black pepper so the chicken gets seasoning all the way through, not just on the crust. The panko mixture should look evenly speckled with parmesan and spices; that even distribution helps the cutlets brown with flavor in every bite. If your hands get clumpy, pause and scrape them clean before moving to the next piece so the coating stays neat.
Frying to a Deep Golden Crust
Use about 1/2 inch of oil and keep the heat at medium-high so the chicken sizzles on contact. Fry each cutlet for 4–5 minutes per side until the crust is deeply golden and the center is cooked through. If the outside browns too fast, the heat is too high; if it looks pale after a couple of minutes, the oil needs more time to come up. Drain the chicken on paper towels so the underside stays crisp instead of steaming on a rack of oil.
Assembling Without Soggy Bread
Toss the romaine with Caesar dressing right before assembling so it stays glossy, not wilted. Start with the bottom bun, then the dressed lettuce, then the hot chicken cutlet, followed by parmesan shavings and the top bun. The order matters because the lettuce helps catch the dressing and the chicken sits directly on top, where it can stay crisp longest. Serve it immediately while the crust is still audibly crunchy.
How to Adapt This Chicken Caesar Sandwich for What You Have
Make it gluten-free
Swap the all-purpose flour for a gluten-free blend and use gluten-free panko. You’ll still get a crisp coating, though the crust may be a little more delicate, so handle the chicken gently when flipping.
Bake instead of fry
Lay the breaded cutlets on a wire rack set over a sheet pan, spray or brush them lightly with oil, and bake at 425°F until browned and cooked through. The crust won’t be quite as shattery as it is from frying, but it will still give you a sturdy, crisp sandwich.
Use chicken thighs for a richer bite
Boneless thighs work if you want more juiciness and a slightly deeper flavor. Pound them to an even thickness so they cook at the same pace as the breasts, and give them a little extra time in the pan if they’re thicker.
Storage and Reheating
- Refrigerator: Store the chicken, lettuce, and buns separately for up to 3 days. The breading softens once it sits with dressing, so keep everything apart until serving.
- Freezer: The fried chicken cutlets freeze well after cooling completely. Wrap them tightly and freeze for up to 2 months; freeze the breading only after frying, not after assembling the sandwich.
- Reheating: Reheat the chicken in a 375°F oven or air fryer until hot and crisp again. Microwaving makes the coating steamy and soft, which is the fastest way to lose the texture you worked for.
Questions I Get Asked About This Recipe
Crispy Chicken Caesar Sandwich
Ingredients
Equipment
Method
- Set up a three-stage breading station with flour seasoned with salt and black pepper, beaten eggs, and a panko-parmesan mix with garlic powder and Italian seasoning.
- Keep the chicken breasts handy for coating and make sure the breading components are in separate stations for quick, even coverage.
- Coat each pounded-thin chicken cutlet in the seasoned flour, shaking off excess.
- Dredge the floured chicken in the beaten eggs, letting excess drip off back into the tray.
- Press the cutlets firmly into the panko-parmesan mixture until fully coated.
- Heat oil to medium-high heat until it’s hot enough for frying and fry the cutlets in about 1/2 inch of oil for 4–5 minutes per side.
- Fry until deeply golden and cooked through, then drain on paper towels.
- Toss chopped romaine lettuce with Caesar dressing until evenly coated.
- Toast the brioche buns, then set the bottom buns in place.
- Layer Caesar-dressed romaine on the bottom buns, then add the crispy chicken cutlet.
- Top with parmesan shavings and cap with the toasted top bun.
- Serve immediately with extra Caesar dressing on the side for dipping and drizzling.