These pumpkin chocolate chip bars bake up soft, thick, and just sturdy enough to slice cleanly once they cool. The crumb stays tender instead of turning cakey, and the chocolate melts into little pockets that keep every bite interesting. What you get is a pan dessert that tastes like fall baking without the fuss of frosting, stacking, or chilling dough.
The balance comes from using pumpkin puree for moisture, oil for a plush texture, and enough spice to support the pumpkin without burying it. The batter is mixed in two bowls and folded together just until the flour disappears, which keeps the bars from turning tough. Once they come out of the oven, they need time to set up; cutting them too early is the fastest way to end up with a soft mess instead of neat bars.
Below, I’ve included the detail that matters most for texture, plus a few smart swaps and storage notes so you can make these bars with confidence.
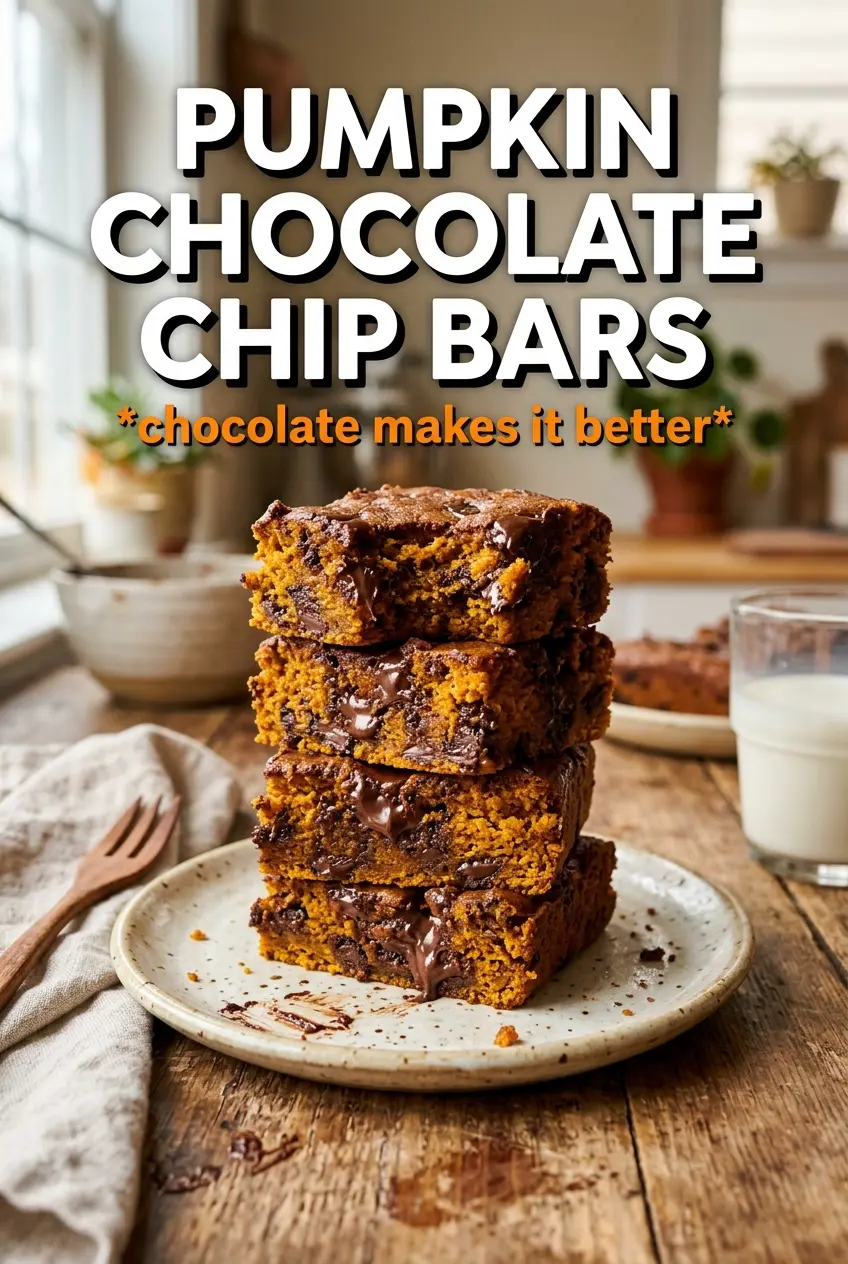
The bars set up beautifully and the chocolate stayed in little melted pockets instead of sinking to the bottom. I let them cool all the way, and they cut into perfect squares without crumbling.
Bookmark these pumpkin chocolate chip bars for the kind of dessert that stays moist, slices cleanly, and keeps the chocolate in every bite.
The Reason These Bars Stay Soft Instead of Drying Out
Most pumpkin bar recipes go wrong in one of two places: they get overmixed, or they’re baked until the center looks fully set in the pan. Both mistakes steal the tender texture you want. Here, the oil does the heavy lifting for moisture, and the pumpkin puree brings body without needing butter to carry the structure. That means you can bake these until the center is just done, then let carryover heat finish the job as they cool.
The other detail that matters is the ratio of leavening to flour. Too much baking soda can make pumpkin bars taste flat and brown too fast; too little leaves them heavy. This version uses enough lift to keep the bars soft and slightly springy, but not so much that they puff like cake and lose that dense, bar-cookie feel.
What the Pumpkin, Oil, and Chocolate Chips Are Each Doing
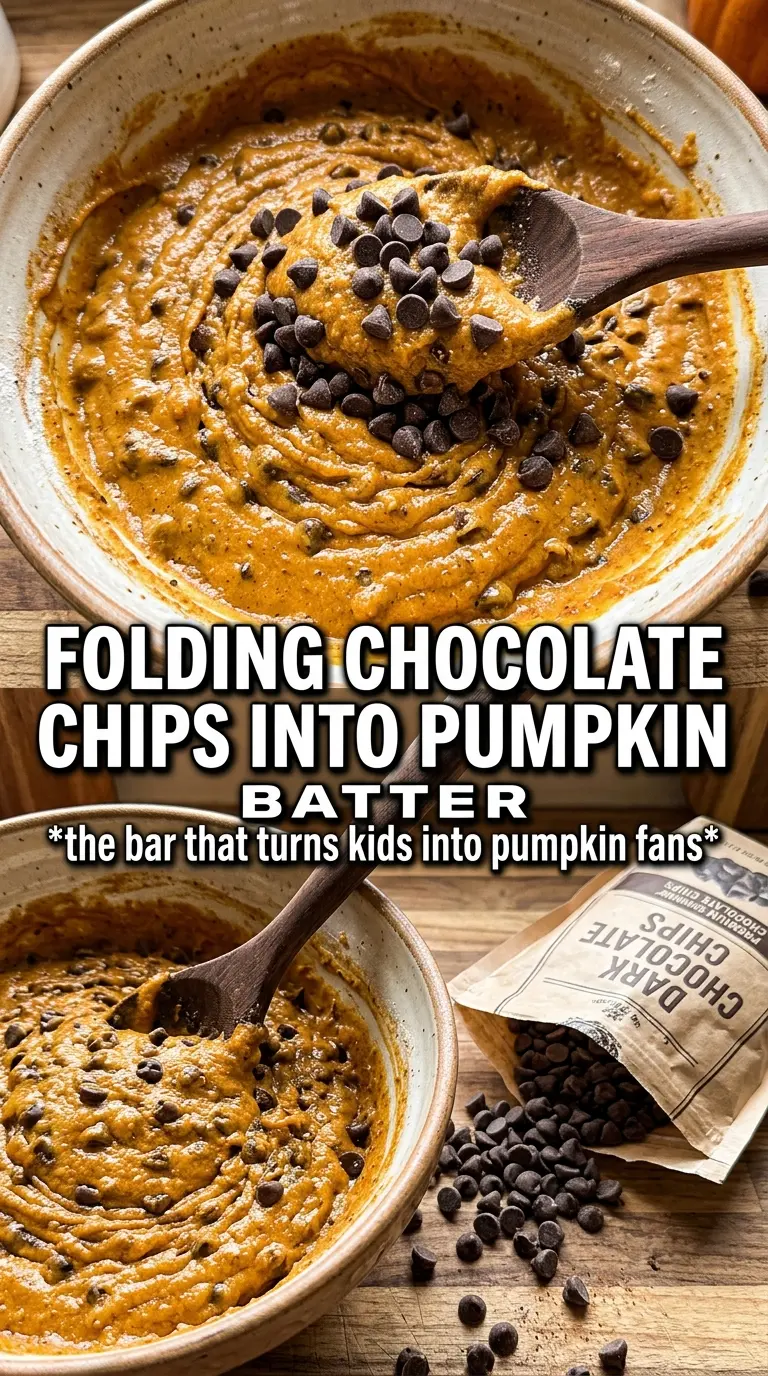
- Pumpkin puree — Use plain pumpkin puree, not pumpkin pie filling. Pie filling already has sugar and spices mixed in, which throws off the texture and makes the bars taste overly sweet. The puree gives moisture, color, and that soft, almost custardy crumb these bars are known for.
- Vegetable oil — Oil keeps the bars tender even after a day in the container. Butter brings flavor, but it also firms up as it cools, which can make pumpkin bars feel drier. If you want the best texture, stick with a neutral oil here.
- Brown sugar and granulated sugar — The brown sugar adds a deeper caramel note and helps the bars stay moist, while granulated sugar gives clean sweetness and a lighter crumb. You need both for the right balance. Swapping all of it for brown sugar makes the bars heavier; using only white sugar makes them flatter in flavor.
- Semi-sweet chocolate chips — Semi-sweet chips hold their shape better than milk chocolate and keep the bars from becoming cloying. Fold most of them in, then scatter the rest on top so you get visible chocolate on the surface instead of everything sinking to the bottom.
Mix, Fold, and Bake Without Losing the Tender Crumb
Whisk the dry ingredients first
Start by whisking the flour, pumpkin pie spice, cinnamon, baking soda, baking powder, and salt together until the color looks even. This keeps the spices from clumping in one bite and helps the leavening distribute all the way through the batter. If you skip this step, you’ll end up with uneven spice pockets and patches that rise differently in the pan.
Build the wet base until it looks smooth
Whisk the pumpkin puree, both sugars, oil, eggs, and vanilla until the mixture looks glossy and uniform. It won’t be fluffy, and that’s fine. You’re looking for a smooth, thick batter base with no streaks of egg or sugar crystals hanging around the bowl.
Fold just until the flour disappears
Add the dry ingredients to the wet mixture and fold gently until you stop seeing dry flour. Stop there. Overmixing develops the flour and turns these bars bouncy instead of tender, which is the opposite of what you want in a pumpkin bar.
Spread, top, and bake to the right set
Spread the batter evenly in the greased 9×13 pan, then scatter the remaining chocolate chips over the surface. Bake until a toothpick comes out clean or with just a few moist crumbs, usually 25 to 30 minutes. If you wait until the center looks completely dry in the oven, the bars will end up overbaked once they cool.
Cool before slicing
Let the pan cool completely before cutting. Warm pumpkin bars are fragile and the chips will drag through the crumb if you slice too soon. Once cool, they cut into neat squares and hold their shape without sticking to the knife.
How to Adapt These Bars for Different Kitchens and Different Cravings
Dairy-Free as Written
These bars are naturally dairy-free if your chocolate chips are dairy-free, which makes them an easy dessert for mixed gatherings. The texture doesn’t suffer because the recipe already relies on oil instead of butter.
Use Mini Chips for Better Distribution
Mini chocolate chips spread more evenly through the batter and give you a little chocolate in every bite. Regular chips make bigger pockets of chocolate, which is great if you want a more dramatic melt on top.
Make Them More Spice-Forward
If you like a stronger pumpkin spice flavor, add another 1/2 teaspoon of pumpkin pie spice. Don’t push the cinnamon much higher unless you want it to dominate the pumpkin, because too much can make the bars taste dry even when the texture is still moist.
Gluten-Free With a 1:1 Flour Blend
A good cup-for-cup gluten-free flour blend can work here, but the crumb may be a little more delicate. Let the bars cool fully before slicing, and expect a slightly softer edge. The rest of the recipe stays the same.
Storage and Reheating
- Refrigerator: Store in an airtight container for up to 5 days. The bars stay moist, and the chocolate firms up a bit when chilled.
- Freezer: These freeze well. Wrap individual bars tightly and freeze for up to 2 months, then thaw at room temperature while still wrapped so condensation doesn’t make the tops sticky.
- Reheating: Warm a bar in the microwave for 10 to 15 seconds if you want the chocolate soft again. Don’t overheat it or the crumb will turn dry at the edges.
Questions I Get Asked About This Recipe
Pumpkin Chocolate Chip Bars
Ingredients
Equipment
Method
- Preheat the oven to 350F and grease a 9x13 pan. Make sure the pan is fully coated so the bars release cleanly.
- Whisk together all-purpose flour, pumpkin pie spice, cinnamon, baking soda, baking powder, and salt. Whisk until the spices are evenly distributed and no lumps remain.
- Whisk pumpkin puree, granulated sugar, brown sugar, vegetable oil, eggs, and vanilla extract until smooth. Stop when the mixture looks glossy and uniform.
- Fold the dry ingredients into the wet ingredients until just combined. Fold gently so you see no dry streaks, but keep the batter thick.
- Fold in 1-1/2 cups semi-sweet chocolate chips. The chips should be scattered throughout so each bar gets chocolate pockets.
- Spread the batter evenly in the greased 9x13 pan. Use a spatula to level the surface for even baking.
- Scatter the remaining semi-sweet chocolate chips over the top. Add them evenly so they form dark pools and pockets as they melt.
- Bake at 350F for 25-30 minutes, until a toothpick comes out clean. Look for a set center and lightly browned edges.
- Cool completely before cutting into bars. For clean squares, wait until the bars feel firm when touched and the chocolate has set.