These pumpkin pie bars land somewhere between a classic pumpkin pie and a sturdy crumb bar, which is exactly why they disappear so fast. The filling sets up smooth and custardy, the oat crust gives you a little chew and a toasty edge, and the crumb topping keeps every square from feeling too soft or one-note. You get all the warm spice and pumpkin flavor people expect, but in a shape that slices cleanly and travels well.
The trick is baking the bottom crust before the filling goes in. That short head start keeps the base from turning soggy once the pumpkin mixture hits the pan, and it gives the bars enough structure to hold without collapsing when you cut them. Cold butter matters here too; it creates those little pockets that bake into a crisp, crumbly layer instead of a dense one.
Below, I’ll walk through the parts that matter most: how to keep the crust from getting pasty, why the filling should go on while the crust is still hot, and how to get clean cuts after chilling. That last step makes a bigger difference than most people expect.
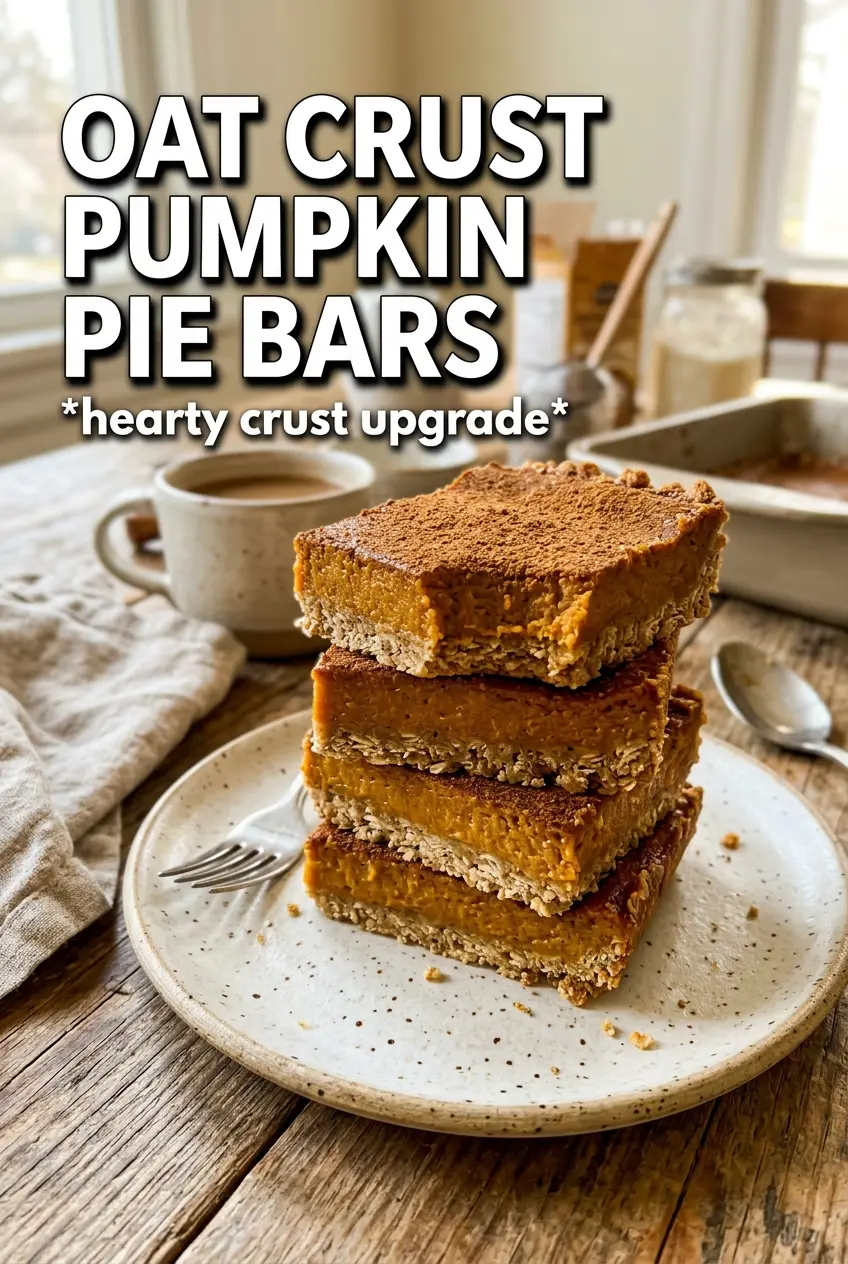
The oat crust stayed crisp on the bottom even after chilling, and the filling set into clean slices without cracking. I brought these to a potluck and people kept asking if they were pie or bars.
These pumpkin pie bars with oat crust slice neatly and keep that buttery crumble on top, even after chilling.
The Part That Keeps the Bottom Crust from Turning Soft
The bottom layer needs a quick bake before the filling goes in. That step sets the butter, dries out the oat mixture just enough, and gives the crust a head start so it can stand up to the pumpkin custard. If you skip it, the bars still bake, but the base tends to go heavy and a little damp under the filling.
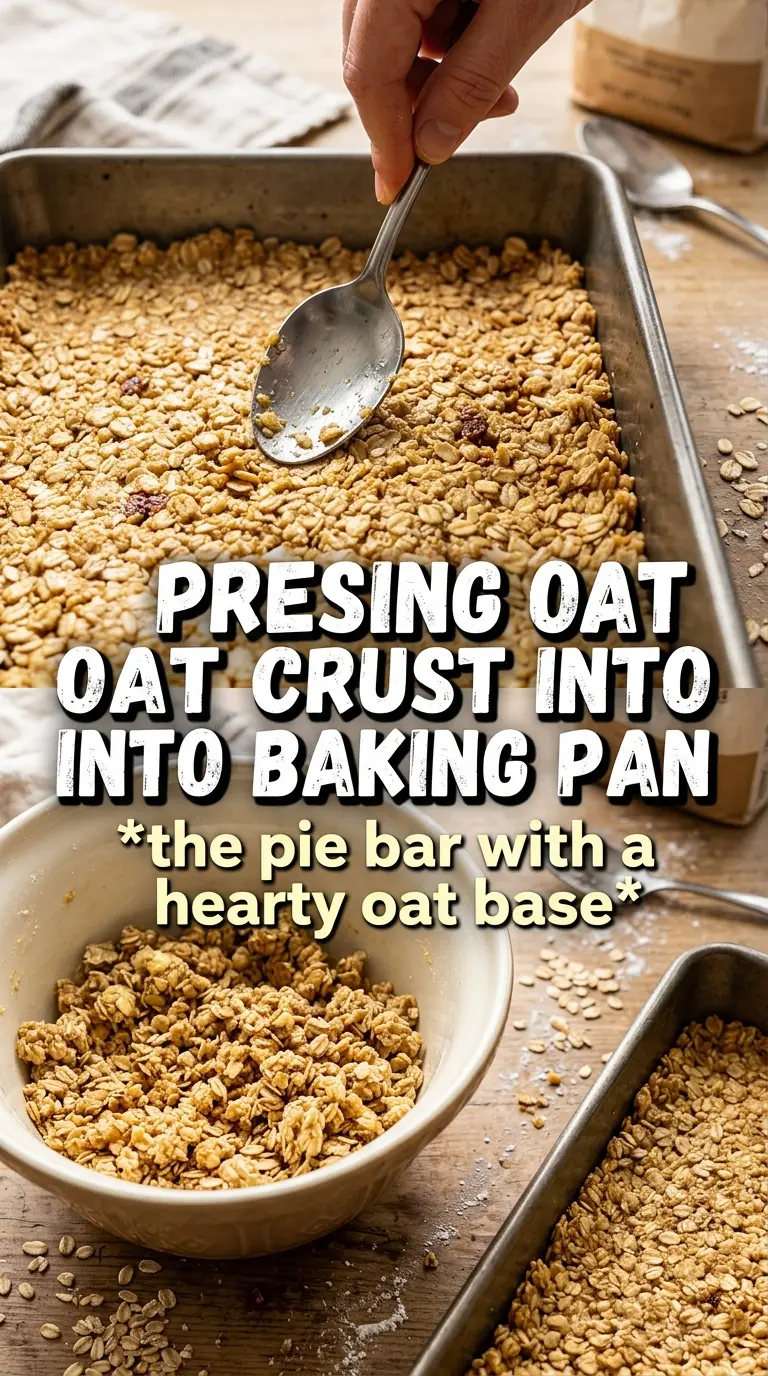
Press the crust in firmly and evenly, especially into the corners. Loose crumbs don’t hold together well once the filling is added. The reserved crumble on top should stay rough and uneven; those craggy bits brown better than a tightly packed layer.
What Each Ingredient Is Actually Doing in These Bars
- Rolled oats — These bring chew and structure to the crust and topping. Quick oats turn mushier, so stick with rolled oats if you want the bars to hold their crumbly texture.
- All-purpose flour — Flour binds the oat mixture just enough to press into a solid base. A 1:1 gluten-free baking blend works if you need a gluten-free version, but the crust will be a little more delicate.
- Brown sugar — This gives the crust a deeper caramel note and helps it brown. Light or dark brown sugar both work; dark brown sugar will push the bars toward a richer molasses flavor.
- Cold butter — Cold butter is what makes the crust and topping sandy and crisp instead of paste-like. Cube it straight from the fridge and cut it in until the mixture looks like uneven, buttery crumbs.
- Pumpkin puree — Use plain pumpkin puree, not pumpkin pie filling. Pie filling already has sugar and spices added, and it throws the balance off fast.
- Evaporated milk — This gives the filling a silky, custardy finish without making it watery. Regular milk won’t set quite the same way, and heavy cream makes the bars richer but denser.
- Pumpkin pie spice, cinnamon, and ginger — This combination builds the warm spice backbone. If your pumpkin pie spice is old and dull, the bars will taste flatter than they should, so use a fresh jar if you can.
- Eggs — Eggs set the filling into clean slices. Whisk them in thoroughly so you don’t get streaks of baked egg in the finished bars.
Building the Crust, Filling, and Crumble in the Right Order
Mix the oat base until it looks sandy, not smooth
Stir the oats, flour, brown sugar, cinnamon, and salt together first so the spices distribute evenly. Then cut in the cold butter until the mixture looks like damp, uneven crumbs with some pea-sized pieces left in it. If it turns into a paste, the butter got too warm or you worked it too long, and the baked crust will come out dense instead of crisp.
Press and pre-bake the bottom layer
Reserve a full cup of the crumb mixture for the top, then press the rest into the parchment-lined pan in an even layer. Pack it down firmly with your fingers or the bottom of a measuring cup so it bakes into a solid base. Bake until the edges look set and the surface loses its raw flour look, about 12 minutes.
Pour the filling onto the hot crust
Whisk the pumpkin puree, evaporated milk, eggs, sugar, spices, salt, and vanilla until smooth and pourable. Pour it over the hot crust as soon as it comes out of the oven. If the crust cools completely before the filling goes on, the layers don’t bond as well and the base can separate when you cut the bars.
Finish with the crumble and bake until just set
Scatter the reserved oat mixture over the filling in loose clumps. Bake until the top is golden and the center gives only a slight wobble when you gently nudge the pan. If the middle still sloshes, it needs more time; if you wait until it looks completely firm in the oven, it usually bakes up dry once cooled.
Chill before slicing
Let the bars cool all the way at room temperature, then refrigerate them for at least an hour before cutting. That chill time firms the custard and gives you those clean squares instead of messy wedges. Use a sharp knife and wipe it between cuts if you want tidy edges.
How to Adapt These Bars Without Losing the Texture
Gluten-Free Oat Crust
Swap the all-purpose flour for a 1:1 gluten-free baking blend. The bars still hold together well, but the crust will be a touch more tender and crumbly, so press it firmly into the pan before baking.
Dairy-Free Version
Use a good plant-based butter stick in place of the unsalted butter and choose an unsweetened evaporated-style coconut milk or oat milk product if you can find one. The flavor stays close, though the crust will brown a little differently and the filling may taste slightly more coconut-forward if you use coconut milk.
Extra-Spiced Filling
If you like a bolder spice hit, add a pinch of cloves or nutmeg to the filling. Keep it modest; too much spice can crowd out the pumpkin and make the bars taste dusty instead of balanced.
Storage and Reheating
- Refrigerator: Store covered for up to 5 days. The crust stays sturdy, and the filling gets a little firmer after the first day.
- Freezer: These freeze well. Cut into bars, wrap tightly, and freeze for up to 2 months. Thaw in the refrigerator so the custard doesn’t weep.
- Reheating: Serve chilled or let them sit at room temperature for 15 to 20 minutes. Don’t microwave them unless you want the filling to soften too much and the crumble to lose its texture.
Answers to the Questions Worth Asking
Pumpkin Pie Bars With Oat Crust
Ingredients
Equipment
Method
- Preheat oven to 375F and line a 9x13 pan with parchment.
- Combine rolled oats, all-purpose flour, brown sugar, cinnamon, and salt, then cut in cold unsalted butter until the mixture looks like crumbly sand.
- Reserve 1 cup of the oat mixture for topping, then press the remaining oat crust firmly into the prepared pan to form an even base.
- Bake for 12 minutes at 375F until the crust looks set and slightly dry on top.
- Whisk pumpkin puree, evaporated milk, eggs, granulated sugar, pumpkin pie spice, cinnamon, ginger, salt, and vanilla until smooth.
- Pour the pumpkin filling over the hot crust, spreading gently so it reaches the edges.
- Scatter the reserved oat crumble evenly over the filling so the topping covers most of the surface.
- Bake 35-40 more minutes at 375F until the topping is golden and the filling is set with a slight jiggle in the center.
- Cool completely at room temperature so the filling fully firms up and slices cleanly.
- Refrigerate for 1 hour before cutting to get neat bar edges and a fully set texture.