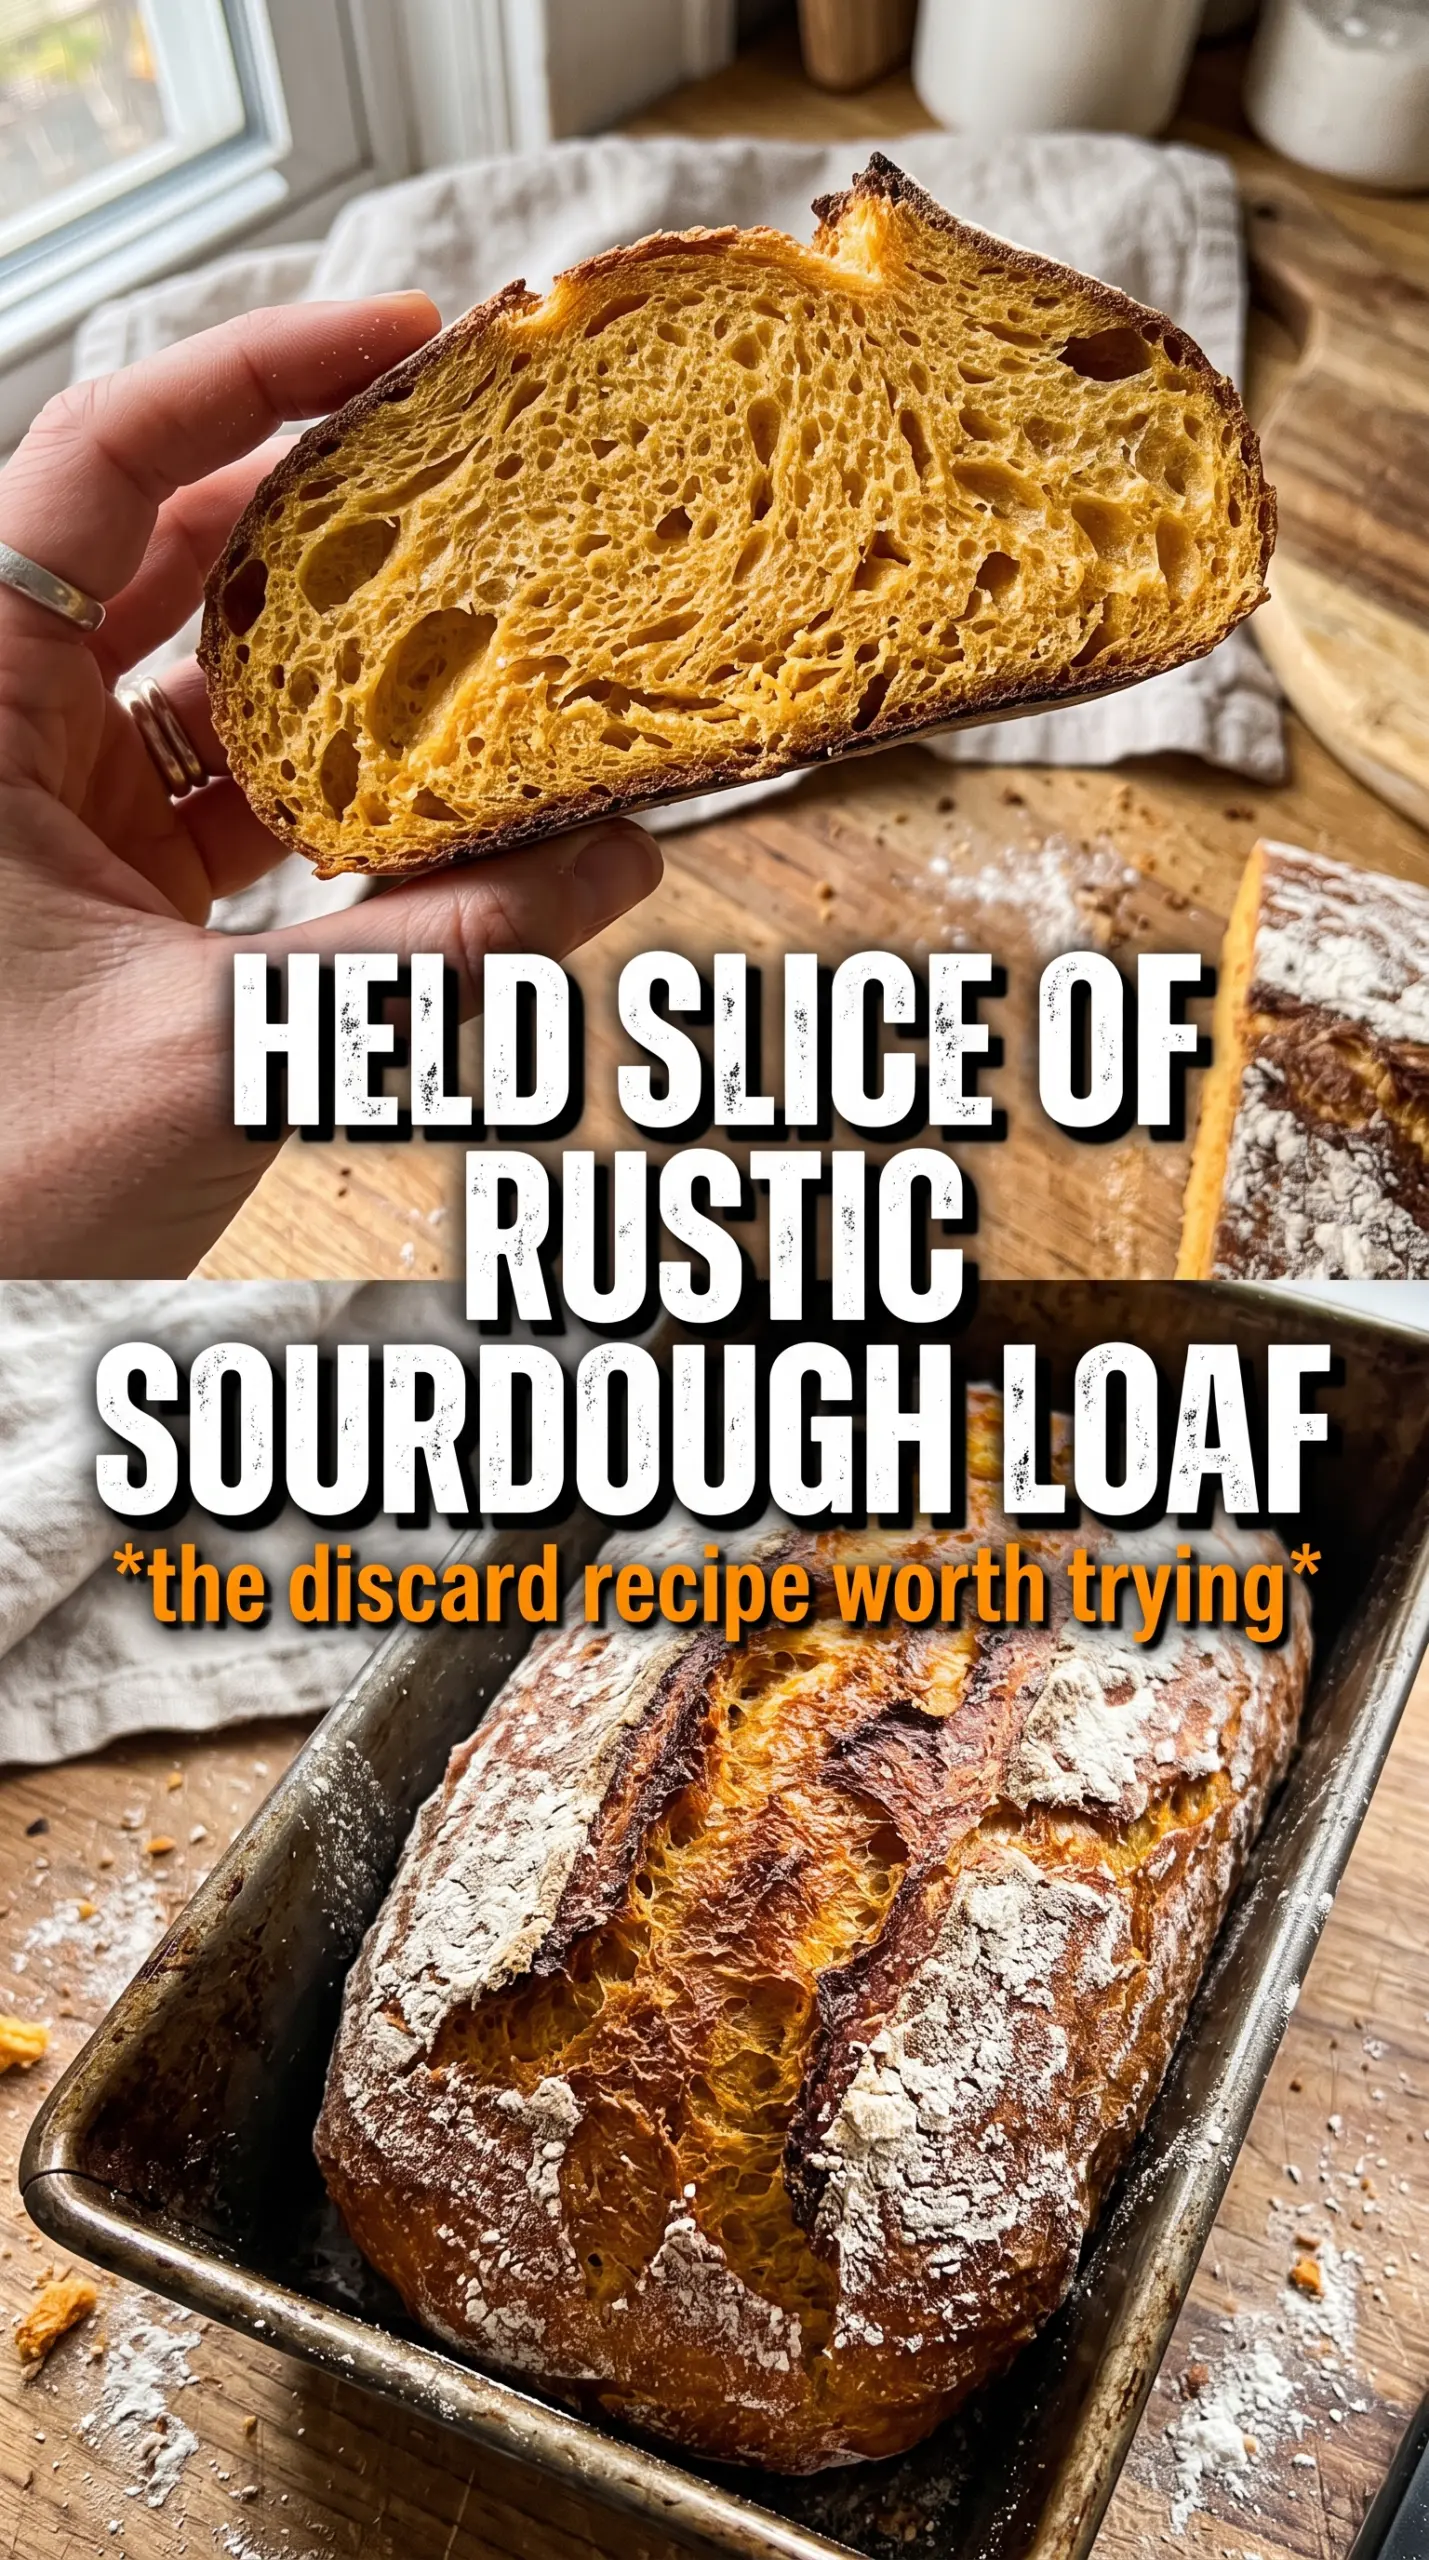
Pumpkin sourdough bread bakes up with a crackling crust, a gentle amber crumb, and just enough sweetness to taste like pumpkin without turning cake-like. The loaf has the kind of depth that makes a plain slice feel special: tangy starter, warm spice, and a soft, moist interior that still holds its shape for toast, butter, or a thick swipe of honey.
What keeps this loaf from getting heavy is the balance of pumpkin puree, bread flour, and a long ferment. Pumpkin adds color and softness, but it also brings extra moisture, so the dough needs time to fully hydrate and develop strength. The stretch-and-folds matter here; they build structure without overworking the dough, which is exactly what you want in a high-hydration sourdough.
Below, I’ve included the part that saves people the most frustration: how to handle the wetter dough, what to look for during bulk fermentation, and the small adjustments that help this bread bake up with a tall, open loaf instead of a dense one.
The dough felt sticky at first, but after the folds it got smooth and manageable. The loaf had a soft, even crumb and the pumpkin spice came through without being overpowering.
Save this pumpkin sourdough bread for the loaf with a golden crust, soft crumb, and warm spice in every slice.
The Moisture Is the Point — and the Trap
Pumpkin puree changes the dough in two ways: it adds flavor and color, but it also softens the dough enough to make it feel looser than a standard sourdough. That’s where a lot of bakes go wrong. If you judge this dough by feel alone on minute one, it can seem too wet; if you keep adding flour, you’ll lose the open crumb and the loaf will bake up tight.
The better test is development over time. After the folds, the dough should gain strength, hold its shape more cleanly, and show bubbles around the edges during bulk fermentation. You’re looking for a dough that is airy and elastic, not stiff. The cold proof also helps here because the chilled dough is easier to score and gives the flour time to fully absorb the pumpkin and water.
What Each Ingredient Is Actually Doing in This Loaf
- Bread flour — This is the backbone of the loaf. It gives the dough enough strength to hold the extra moisture from the pumpkin. All-purpose flour will work in a pinch, but the crumb will be less chewy and the loaf may spread more.
- Whole wheat flour — This adds a little nuttiness and gives the dough more fermentation activity. You don’t need much. Any more and the loaf starts to feel denser instead of rustic.
- Active sourdough starter — Use starter that is bubbly and at or near peak rise. A weak starter won’t give you enough lift before the dough overproofs. If your starter is sluggish, feed it again and wait until it smells sweet and looks domed.
- Pumpkin puree — Use plain pumpkin puree, not pumpkin pie filling. The puree is what gives the loaf its color, moisture, and mellow squash flavor. If your puree looks watery, stir it well before measuring so the dough doesn’t turn soupy.
- Maple syrup — This nudges the flavor toward warmth and helps the crust brown. Honey can stand in, but maple pairs better with the spice and pumpkin. Keep the amount modest or the loaf starts tasting more sweet than bready.
- Pumpkin pie spice and cinnamon — These are there to support the pumpkin, not cover it up. Fresh spices matter here because the loaf is baked long enough for the aroma to settle into the crumb. If your spice jar has been open forever, the bread will taste flat.
- Rice flour — This is the best choice for dusting the banneton because it resists absorbing moisture. That means the shaped loaf releases more cleanly after the cold proof. Regular flour can turn paste-like and stick to the dough.
How to Build Strength Without Tearing the Dough
Autolyse Before the Salt Goes In
Mix the flour, starter, water, pumpkin puree, maple syrup, and spices first, then let the dough rest for 30 minutes. This pause gives the flour time to hydrate and starts gluten development before salt tightens the dough. If the dough looks shaggy and uneven at first, that’s normal. Don’t chase smoothness yet.
Folding Until the Dough Starts to Hold Itself
Add the salt, then work through four sets of stretch and folds every 30 minutes. Early folds will feel slack and a little sticky, but each round should give you more resistance and a smoother surface. If the dough tears, it wasn’t rested long enough between folds. Stop pulling so hard and let the gluten do the work.
Reading Bulk Fermentation by the Edges, Not the Clock
Let the dough bulk ferment for 4 to 6 hours at room temperature until it has doubled and looks bubbly. The top should be domed, the sides should show visible air pockets, and the dough should jiggle slightly when you move the container. If it triples or turns fragile and soupy, it has gone too far and won’t hold its shape well in the oven.
Shaping for a Tall Oven Spring
Turn the dough onto a lightly floured surface and shape it into a boule or batard with enough surface tension to hold its form. Use rice flour in the banneton so the seam releases cleanly later. If the shape looks loose, let it rest a few minutes and tighten it again rather than forcing a rough final shape all at once.
Cold Proof, Hot Oven, Deep Color
Refrigerate the shaped loaf overnight, then preheat the oven to 500°F with the Dutch oven inside for a full 45 minutes. Score the top decisively; a shallow score won’t open cleanly. Bake covered first, then uncover and finish until the crust is a deep golden brown with darker edges. Let it cool completely on a wire rack before slicing, or the crumb will compress and seem gummy.
How to Adapt This for a Different Loaf, a Different Diet, or a Smaller Kitchen
Gluten-Free Isn’t a Straight Swap Here
This loaf depends on gluten for structure, so a direct gluten-free flour swap won’t behave the same way. You’d need a formula built around a gluten-free sourdough blend and binders designed for bread, not a simple one-for-one replacement. The texture will be more tender and less open.
For a Milder Pumpkin Flavor
Cut the pumpkin pie spice in half and keep the cinnamon. The loaf will taste more like a classic sourdough with a subtle pumpkin note instead of a spiced breakfast bread. This is the move if you want the color and moisture without a heavy spice finish.
Honey in Place of Maple Syrup
Honey works in the same amount and gives the loaf a slightly deeper sweetness. It won’t taste quite as earthy as maple, and the crust may brown a touch faster. Keep an eye on it during the uncovered bake.
Make It Ahead Without Losing Quality
This bread actually benefits from a long cold proof, so the overnight rest is part of the recipe, not just a convenience. After baking, let it cool completely, then slice and freeze what you won’t use within a couple of days. Toasting brings the crust right back.
Storage and Reheating
- Refrigerator: Up to 4 days, wrapped well. The crumb will firm up in the fridge.
- Freezer: Slices freeze well for up to 2 months. Wrap tightly and freeze after the loaf has cooled completely.
- Reheating: Toast slices straight from the freezer or warm a whole loaf briefly in a low oven. Don’t microwave it unless you want a soft crust and a rubbery crumb.
Questions I Get Asked About This Recipe

Pumpkin Sourdough Bread
Ingredients
Equipment
Method
- In a large bowl, mix bread flour, whole wheat flour, active sourdough starter, water, pumpkin puree, maple syrup, pumpkin pie spice, and cinnamon until no dry flour remains; then cover and rest 30 minutes at room temperature (autolyse). During the rest, the dough should look slightly smoother and feel hydrated.
- Add the salt and mix thoroughly until fully incorporated, then let the dough rest 30 minutes at room temperature. Perform 4 sets of stretch and folds, one set every 30 minutes.
- For each stretch-and-fold set, gently stretch the dough up and fold it over itself, rotating the bowl about 90° between folds. After the final set, the dough should feel tighter and hold shape better.
- Cover and bulk ferment at room temperature for 4–6 hours until doubled and visibly bubbly. The dough is ready when it looks airy and you see bubbles across the surface.
- Shape the dough into a boule or batard, then place it seam-side up in a banneton dusted with rice flour for shaping. The surface should be smooth and well-tensioned during shaping.
- Refrigerate overnight for a cold proof of 8–12 hours. The dough should feel puffy but still cool when you remove it to bake.
- Preheat the oven to 500°F with a Dutch oven inside for 45 minutes. The pot must be hot so the loaf springs right away.
- Carefully turn the dough out onto parchment and score the top, then place it into the hot Dutch oven and cover. Keep the loaf seam side up as it goes into the pot.
- Bake covered at 500°F for 20 minutes until the crust color starts to set and expand. You should see significant oven spring and a firming surface.
- Uncover and bake at 500°F for 20–25 minutes more until deeply golden. The loaf should look caramel-browned with darker edges.
- Remove the bread and cool completely on a wire rack before slicing. Letting it cool fully prevents a gummy interior and helps the open crumb set.