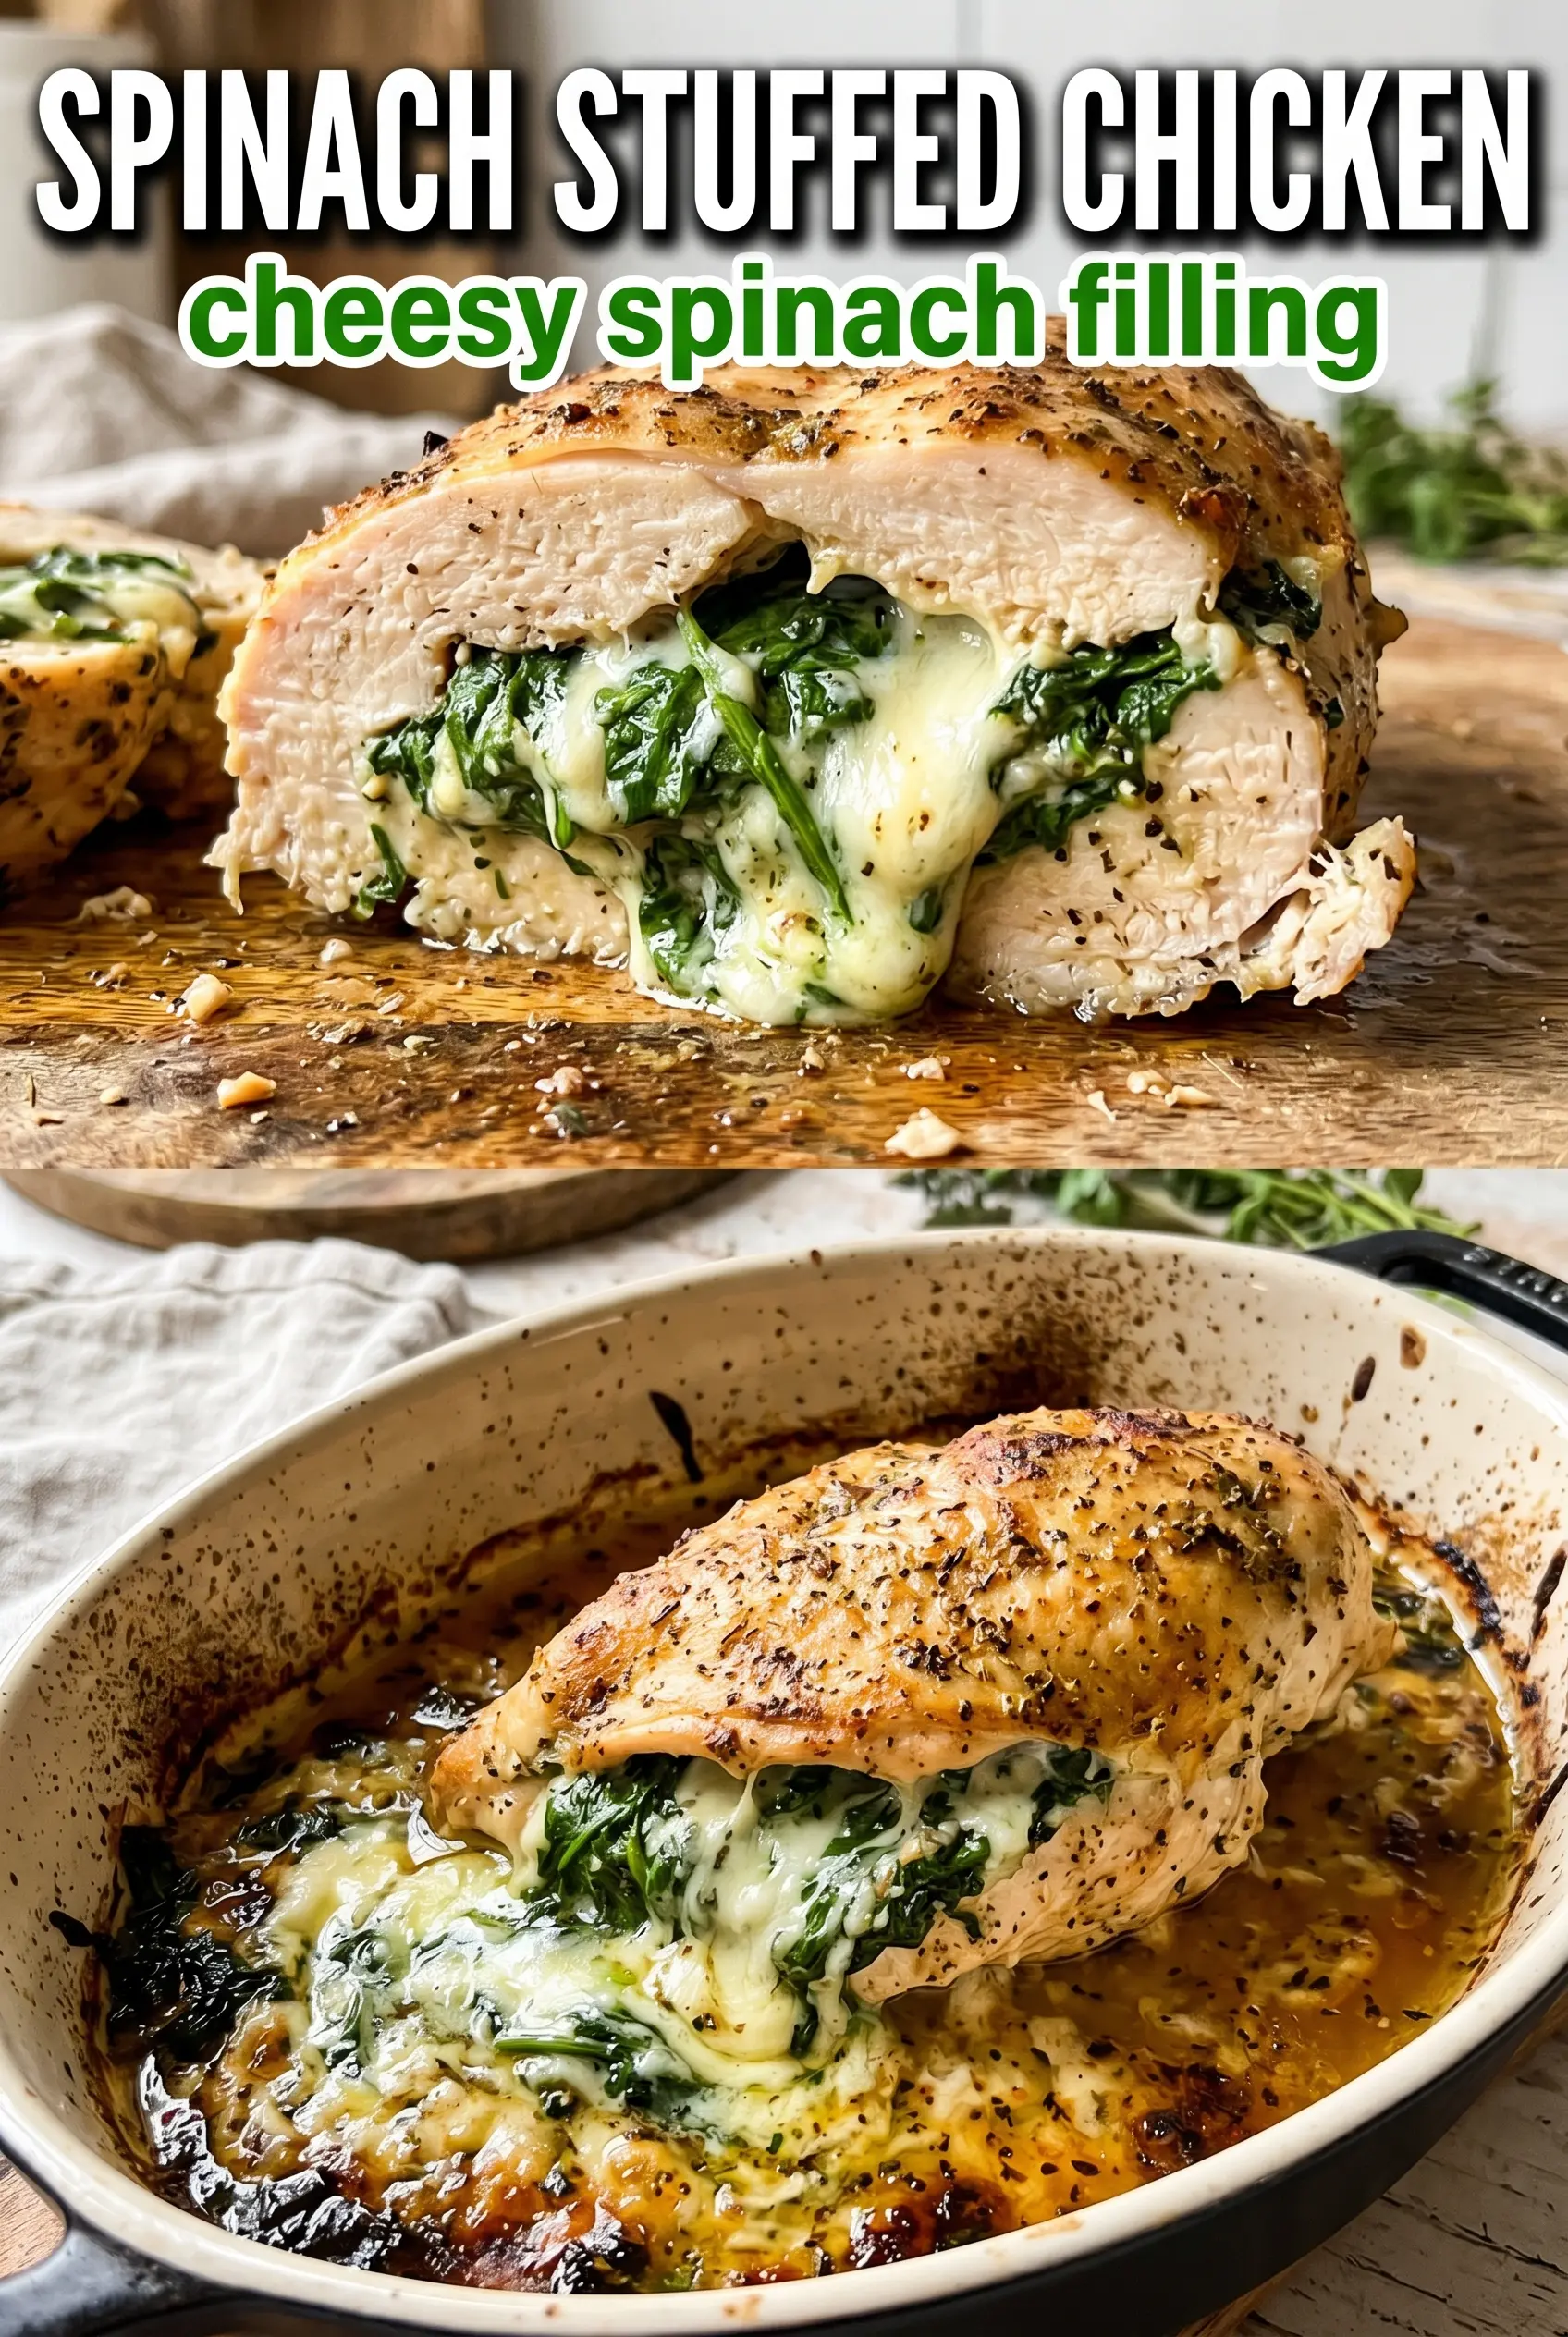
Spinach stuffed chicken breasts earn their place in the dinner rotation when the outside turns deeply golden and the center stays creamy, tangy, and just a little bit stretchy from the mozzarella. The contrast does most of the work here: seasoned chicken with a proper sear, then a filling that melts into the pocket instead of leaking all over the pan.
The part that makes this version dependable is the balance in the filling. Cream cheese gives body, spinach keeps it from feeling heavy, and sun-dried tomatoes bring a little sharp sweetness that cuts through the richness. A hot skillet starts the crust before the chicken goes into the oven, which means you get color without drying out the meat. If you’ve ever made stuffed chicken that tasted good but looked pale and sad, the sear fixes that fast.
Below you’ll find the small details that matter most: how to cut the pocket without going too far, how to keep the filling from escaping, and what to do if you want a variation that fits your pantry or diet.
The filling stayed put, the chicken stayed juicy, and the sun-dried tomatoes gave it a little pop that kept it from tasting heavy. I baked it the full time and still got clean slices with that creamy center.
Like this spinach stuffed chicken? Save it to Pinterest for a creamy, golden chicken dinner with a proper seared crust and melty center.
The Pocket Cut That Keeps the Filling Where It Belongs
The biggest mistake with stuffed chicken is cutting too shallow or slicing all the way through. You want a deep horizontal pocket with three sides still sealed, so the filling has somewhere to settle without spilling out when the chicken hits the pan. A sharp knife helps here, but the real trick is slowing down near the far edge so you can stop before you break through.
Seasoning matters more than people think. Chicken breast needs help inside and out, because the filling softens the center while the sear builds flavor on the outside. The oven finishes the job gently, which keeps the meat juicy instead of tough and stringy.
What Each Ingredient Is Actually Doing in This Dish

- Chicken breasts — Use boneless, skinless breasts that are similar in size so they cook at the same pace. If one is much thicker, pound the thicker end a little before cutting the pocket. That helps the chicken cook through before the outside gets too dark.
- Cream cheese — This is the binder that keeps the filling creamy and stable. It needs to be softened so it mixes smoothly; cold cream cheese leaves little lumps and makes stuffing harder.
- Fresh baby spinach — Chop it finely so it blends into the filling instead of clumping. Fresh works best here because frozen spinach holds extra water unless it’s squeezed very dry, and that water can thin the filling.
- Mozzarella — This brings the stretch and helps the filling hold together as it bakes. Part-skim mozzarella works fine, but shred it yourself if you can; pre-shredded cheese doesn’t melt quite as smoothly.
- Sun-dried tomatoes — They add a concentrated tang and a little sweetness that keeps the filling from tasting flat. Oil-packed tomatoes are especially good here, but drain them well so the filling doesn’t get greasy.
- Toothpicks — These are worth using. They keep the filling inside while the chicken sears, and removing them before serving gives you clean slices instead of a messy plate.
Building the Sear Before the Oven Takes Over
Mixing the Filling
Beat the cream cheese first until it’s smooth, then fold in the spinach, mozzarella, sun-dried tomatoes, garlic, and seasoning. The mixture should look thick and scoopable, not wet. If it seems loose, the spinach may have been packed too tightly or the tomatoes weren’t drained well enough. A firmer filling is easier to stuff and less likely to leak during searing.
Stuffing and Securing the Chicken
Open each pocket gently and spoon in the filling without overstuffing. The chicken should close around the filling with just a little bulge, not split open at the seam. Secure the opening with two or three toothpicks, angled across the seam so they grip the meat. If the pocket is overloaded, some filling will escape no matter how carefully you sear it.
Searing for Color
Heat the oil until it shimmers, then lay the stuffed chicken in the pan and leave it alone long enough to form a crust. That first side should release on its own when it’s ready; if it sticks, it needs another minute. You’re not cooking it through here, just building a browned exterior that gives the finished dish its deep flavor and better appearance.
Finishing in the Oven
Transfer the skillet to the oven and cook until the chicken reaches 165°F at the thickest part. A thermometer matters here because stuffed chicken can look done on the outside while the center is still undercooked. Rest it for five minutes before slicing so the juices settle and the filling thickens slightly instead of running out across the board.
How to Adapt This for a Different Pan, Pantry, or Diet
Dairy-Free Version
Use a dairy-free cream cheese and a good melting dairy-free mozzarella. The filling will be a little softer and less stretchy, but it still works if you keep it thick and chill it for 10 minutes before stuffing. Skip any watery substitutes or the filling may seep out.
No Sun-Dried Tomatoes
Replace them with finely chopped roasted red peppers or leave them out and add a pinch more Italian seasoning. You’ll lose some tang and sweetness, so the filling tastes milder and a little more classic, but the texture stays the same.
Gluten-Free and Naturally Low Carb
This recipe is already gluten-free and low carb as written, as long as your seasonings are clean. That makes it an easy option for a dinner that feels a little special without changing the ingredient list.
Make-Ahead Assembly
You can stuff and secure the chicken a few hours ahead, then keep it covered in the refrigerator until dinner. Don’t sear it too far in advance or the crust softens before baking. A cold rest in the fridge also helps the filling stay put.
Storage and Reheating
- Refrigerator: Store leftovers for up to 3 days in an airtight container. The filling stays creamy, though the chicken firms up a bit once chilled.
- Freezer: Freeze cooked stuffed chicken for up to 2 months, wrapped well and sealed in a container. Thaw overnight in the refrigerator before reheating so the center warms evenly.
- Reheating: Warm in a 325°F oven, covered loosely with foil, until heated through. The mistake to avoid is blasting it in the microwave, which can turn the chicken rubbery before the filling warms up.
Answers to the Questions Worth Asking
Spinach Stuffed Chicken Breasts
Ingredients
Equipment
Method
- Preheat oven to 400°F. Beat together cream cheese, chopped spinach, shredded mozzarella, sun-dried tomatoes, minced garlic, Italian seasoning, salt, and pepper until fully combined.
- Cut a deep horizontal pocket in each chicken breast, being careful not to cut all the way through. Season inside and out generously with salt, pepper, garlic powder, Italian seasoning, and smoked paprika.
- Spoon the filling into each chicken pocket. Secure each breast with 2-3 toothpicks so the filling stays inside.
- Heat olive oil in an oven-safe skillet over medium-high heat until shimmering. Sear stuffed chicken for 3-4 minutes per side until golden.
- Transfer the skillet to the oven and bake for 18-22 minutes, until the internal temperature reaches 165°F. The chicken should look cooked through with a set, golden exterior.
- Remove toothpicks and rest the chicken for 5 minutes. Slice and serve to reveal the molten spinach and cream cheese filling.