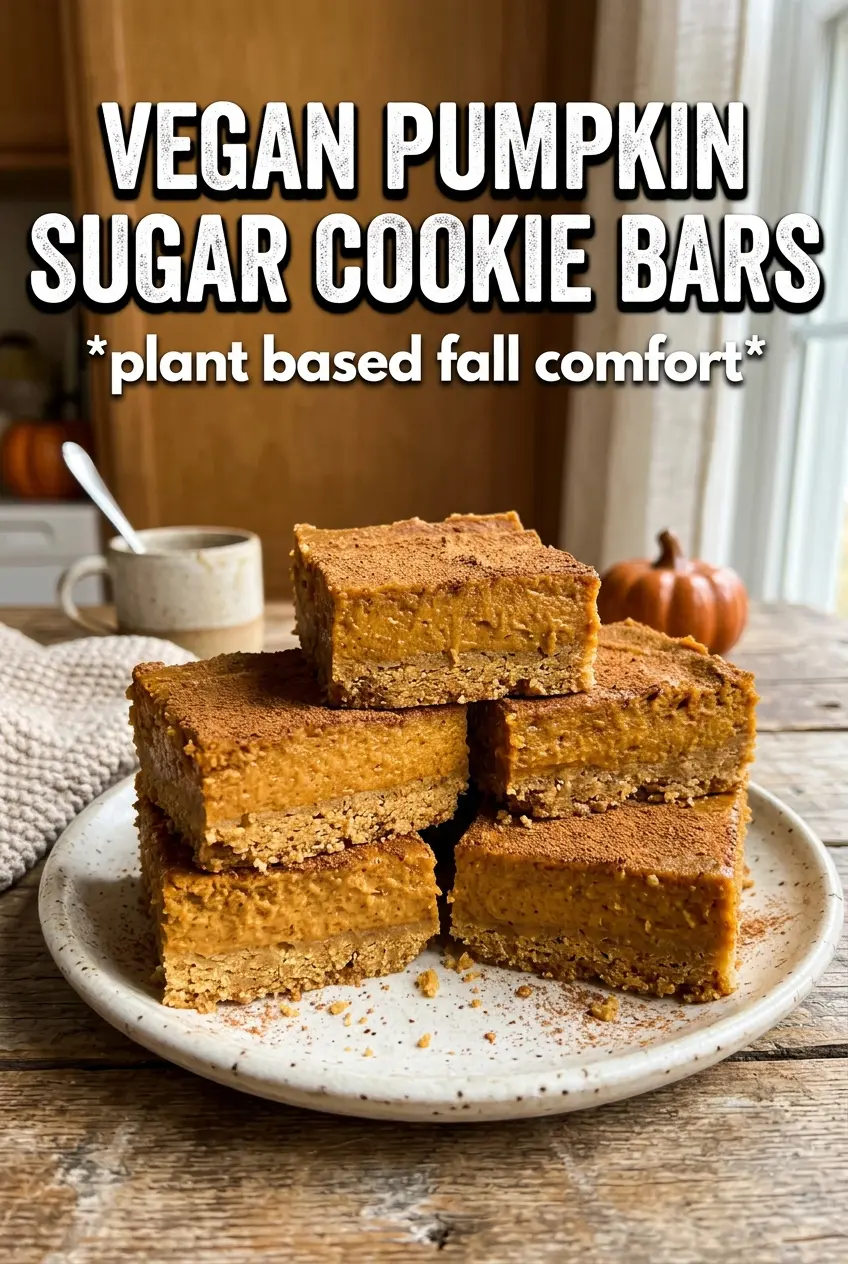
Sugar cookie vegan pumpkin bars land right in the middle of cozy and practical: a tender, lightly sweet crust on the bottom, a smooth pumpkin layer in the middle, and a cool frosting finish that sets the whole thing off. The base stays sturdy enough to slice cleanly, but it still eats like a soft sugar cookie instead of a dry bar crust. That balance is what makes these disappear fast.
The trick is using cold vegan butter in the dough and par-baking the crust before the filling goes in. That gives you a base that holds up under the pumpkin layer instead of turning soft and pasty. The filling leans on coconut milk for richness and cornstarch for a clean set, so you get a sliceable bar without eggs or dairy.
Below, I’ve included the details that matter most: how to keep the crust from getting tough, why the bars need a full chill before frosting, and a few swaps that still keep the texture where it should be.
The pumpkin layer set up beautifully and the crust stayed like a soft sugar cookie instead of turning soggy. I chilled them overnight and the frosting sliced cleanly with no dragging at all.
Like this layered pumpkin dessert? Save it to Pinterest for the days when you want a sliceable bar with a cookie base and dairy-free frosting on top.
The Reason the Crust Stays Tender Instead of Turning Dense
The base here works because it behaves more like a shortbread-style cookie dough than a press-in crust. Powdered sugar keeps it soft, and the cold vegan butter gives you that sandy, tender texture before it bakes into a firm layer. If you overwork the dough, it turns tight and bready instead of cookie-like, so stop mixing as soon as it comes together.
That first 12-minute bake matters. The crust needs enough time to set before the pumpkin filling goes on, or the bottom softens and the bars lose their clean slices. You’re not looking for deep color here, just a pale golden surface that feels set in the center when you tap the pan.
What Each Ingredient Is Actually Doing in the Pan
- Vegan butter — Cold, cubed butter is what creates the tender cookie base. If it’s soft going in, the dough loses that crumbly texture and bakes up flatter and heavier. Stick with a block-style vegan butter if you can; tub spreads contain more water and can make the crust greasy.
- Full-fat coconut milk — This gives the pumpkin layer body and richness without eggs or dairy. Light coconut milk won’t set as well and usually tastes thinner. Shake the can, or whisk it well before measuring so the fat and liquid are evenly blended.
- Cornstarch — This is the setting agent that holds the filling together once it bakes and chills. Flour won’t give the same smooth, custardy texture. Whisk it thoroughly into the filling before it hits the crust so you don’t end up with tiny starchy pockets.
- Vegan cream cheese — The frosting depends on a thick, tangy base, not just powdered sugar and milk. A soft vegan buttercream works in a pinch, but you’ll lose that cheesecake-like finish. Let the bars chill first, or the frosting will melt and slide.
Building the Layers So the Bars Slice Cleanly
Mixing the Cookie Base
Start by cutting the cold vegan butter into the dry ingredients until the mixture looks sandy with pea-size bits scattered through it. Add the plant milk and vanilla just until the dough comes together when pressed. If it feels sticky or greasy, the butter got too warm, and the crust will bake up dense instead of tender.
Pressing and Par-Baking
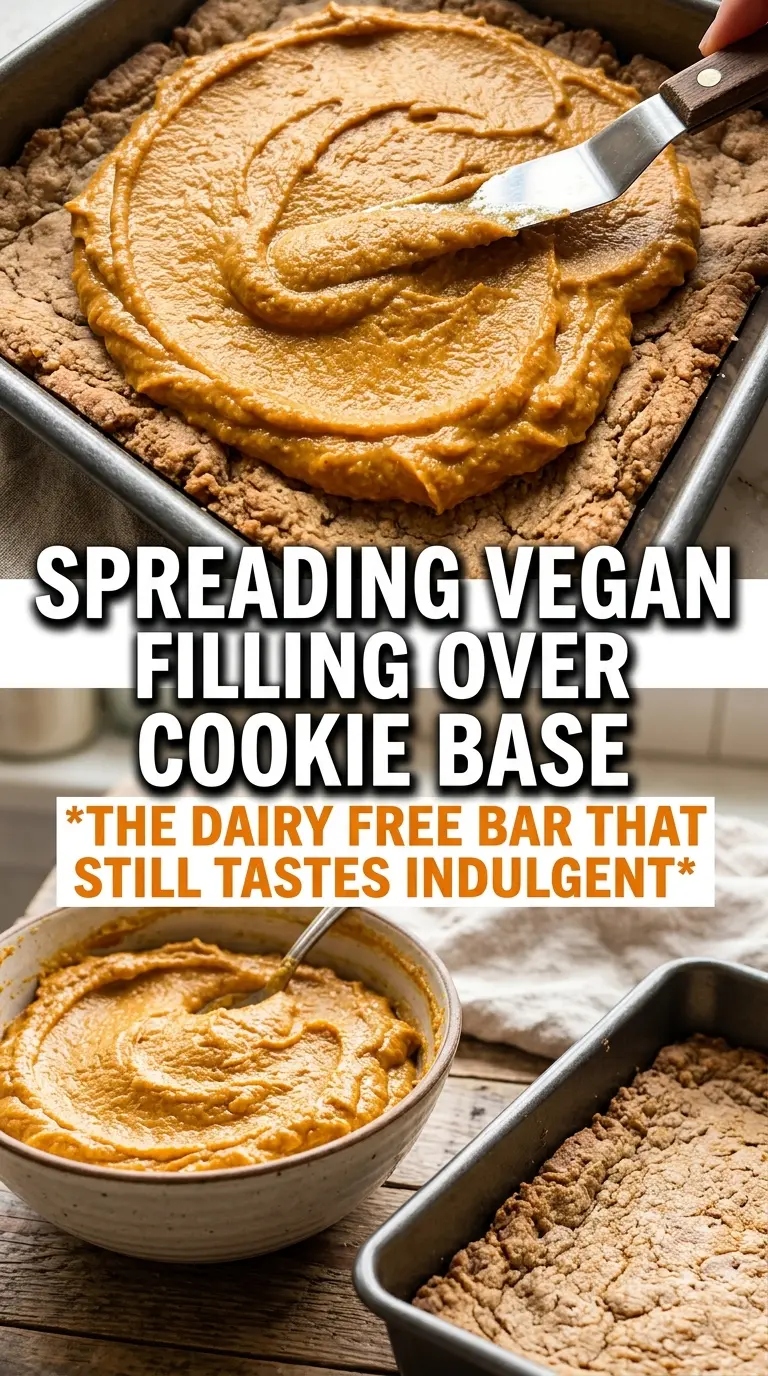
Press the dough evenly into the parchment-lined pan, pushing it all the way into the corners so the filling has a solid edge to sit on. Bake it until the top looks set and just barely turning golden at the edges. Don’t wait for a deep brown crust, because it keeps baking after you add the filling.
Whisking the Pumpkin Layer
Whisk the pumpkin puree, coconut milk, sweetener, cornstarch, spices, and vanilla until the mixture is completely smooth. If you see streaks of cornstarch, keep whisking; those streaks turn into gummy spots once baked. Pour the filling over the warm crust and spread it gently so you don’t tear the base.
Baking, Cooling, and Frosting
Bake until the center is just set with a very slight wobble in the middle. It should not slosh when you move the pan. Cool the bars completely, then chill them for at least 2 hours before frosting. That chill time firms the pumpkin layer so the frosting stays on top instead of melting into the bars.
How to Adjust These Bars Without Losing the Texture
Gluten-Free Version
Use a 1:1 gluten-free baking flour in the crust and keep everything else the same. The bars will still slice well, though the base may be a little more delicate, so let them cool completely before moving them. Don’t swap in almond flour alone; it won’t give the same press-and-bake structure.
Less Sweet, More Spiced
Cut the maple syrup slightly and lean harder on the pumpkin pie spice and cinnamon if you want a less dessert-sweet bar. The filling will still set, because the cornstarch and coconut milk are doing the structural work. Just don’t reduce the sweetener too much or the filling can taste flat and the crust won’t read as a sugar cookie.
No Coconut Flavor
If coconut isn’t your thing, use a rich unsweetened plant cream in the filling instead. The texture will still be creamy, but the bars may set a touch softer, so give them the full chill time. Thin plant milks won’t replace the fat here.
Storage and Reheating
- Refrigerator: Store covered for up to 5 days. The frosting and pumpkin layer hold best when chilled, and the crust stays cleanly sliceable.
- Freezer: These freeze well without the frosting. Wrap the cut bars tightly and freeze for up to 2 months, then thaw in the fridge before frosting or serving.
- Reheating: These are best served chilled or at cool room temperature, not warmed. Heat softens the filling and makes the frosting slide, which is the fastest way to lose the clean bar shape.
Answers to the Questions Worth Asking
Sugar Cookie Vegan Pumpkin Bars
Ingredients
Equipment
Method
- Preheat the oven to 350F and line a 9x13 pan with parchment so the bars release cleanly.
- Combine all-purpose flour, powdered sugar, baking powder, and salt, then cut in cold vegan butter until the mixture looks like coarse crumbs.
- Add plant milk and vanilla and mix until dough forms, then press the dough evenly into the lined pan.
- Bake for 12 minutes at 350F until the edges look lightly set and slightly golden.
- Whisk pumpkin puree, full-fat coconut milk, maple syrup or sugar, cornstarch, pumpkin pie spice, cinnamon, and vanilla until smooth and free of lumps.
- Pour the pumpkin filling over the warm crust and gently spread to the edges.
- Bake for 20 to 22 more minutes at 350F until the filling is set with only a slight jiggle in the center.
- Cool completely at room temperature, then refrigerate for 2 hours so the bars slice cleanly.
- Beat vegan cream cheese, powdered sugar, plant milk, and vanilla until smooth, then spread the frosting over the chilled bars.
- Slice and serve once the frosting is set, using a sharp knife for neat edges.